It’s been 2 years since I started growing carnivorous plants in a greenhouse.
My setup - which I documented on the blog back in 2018 - has weathered two summers and two winters, and while my plants are thankfully still thriving, the extremes of hot and cold have been very educational.
I often receive emails from CP and orchid enthusiasts telling me how useful they found that original post when building their own setup. Because of this, I thought now would be a good time to write a follow-up and share some of the things I’ve learned since I first started growing in a greenhouse.
Hopefully this post is useful. Pretty plant photos are distributed throughout!
Contents
- Why backups aren’t enough
- Electricity, RCDs, and waterproof sockets
- How to use a gas heater in a greenhouse
- Microclimates & monitoring
1. Backups aren’t enough; you need redundancy
About a month ago, the power went out in my house. At first I assumed it was a powercut, but I quickly realised that wasn’t the case.
It was cold outside; not freezing, but cold enough to make a Nepenthes very sad. Worse still, I was due to travel abroad for Christmas later that same day, so I had about an hour to decide what to do. If I couldn’t fix the problem, I’d have to cut my losses, haul all my plants indoors, and spend my week away hoping that my cat wouldn’t eat my N. truncata (or vice versa!).
Click on any photo to zoom in. Use arrow keys or swipe to navigate.
.CgnW8pJ3_28VfkB.webp) Nepenthes hamata x edwardsiana (AW)
Nepenthes hamata x edwardsiana (AW) .AnHBe1zg_Z1j4PPi.webp) Nepenthes singalana (SG)
Nepenthes singalana (SG) .D1V0lKc3_16WbU4.webp) Nepenthes spathulata x edwardsiana (SG)
Nepenthes spathulata x edwardsiana (SG) .VyqBjhHE_znwGB.webp) Nepenthes veitchii x burbidgeae (EP)
Nepenthes veitchii x burbidgeae (EP) Upon inspecting my consumer unit (aka. the fusebox) I discovered that the RCD had tripped. RCDs - residual current devices - are designed to protect against electrocution in the event of faulty equipment and are a legal requirement in the UK. You’ll often find that the circuit breakers in your property (lights, kitchen, etc) aren’t protected by individual RCDs; instead, a single RCD covers all or half your breakers. This means that when something trips your RCD, all the circuits it protects - which in my case was basically everything in the house - are switched off, and cannot be turned back on until the faulty device is identified and unplugged.
Click on any photo to zoom in. Use arrow keys or swipe to navigate.
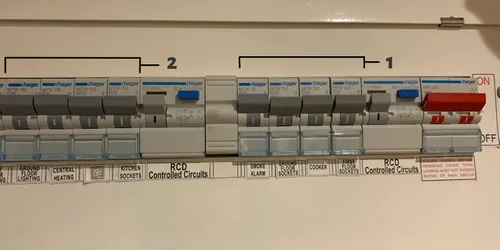 Consumer unit with split load RCDs
 Through trial and error I identified that it was my greenhouse heater which was faulty: once it was unplugged, I could switch the RCD back on. I hastily fired up my emergency propane gas heater - which doesn’t require any electricity - and set it to maintain about 11C. A week later I returned home to zero casualties: plants (and cats) were fine.
I’ll offer some recommendations around gas heaters later in this post, but for now, the point I want to make is this: don’t think in terms of backups, think in terms of redundancy. Redundancy simply means that critical systems (e.g. heating) are duplicated in such a way that the failure of one device won’t affect another. A good example would be Bayliss vent openers: they rely on the expansion of wax to open vents in hot weather, and so don’t depend on electricity, a water supply, or anything else.
In my case, it wouldn’t have mattered if I had a second electric fan heater running in the greenhouse: the failure of one component meant that the entire electricity supply went out. That includes my SensorPush base station, meaning I wouldn’t have received any remote alerts once the temperature started dropping. If it had been summer, my hydrofogger and fans would’ve failed too.
Click on any photo to zoom in. Use arrow keys or swipe to navigate.
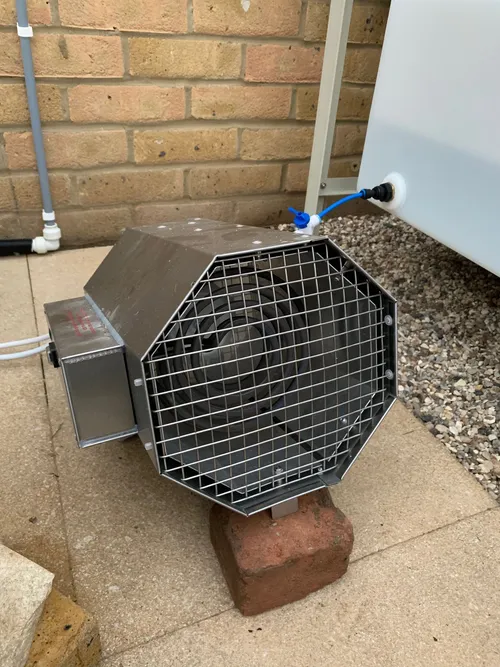 01. The electric fan heater which developed a fault
 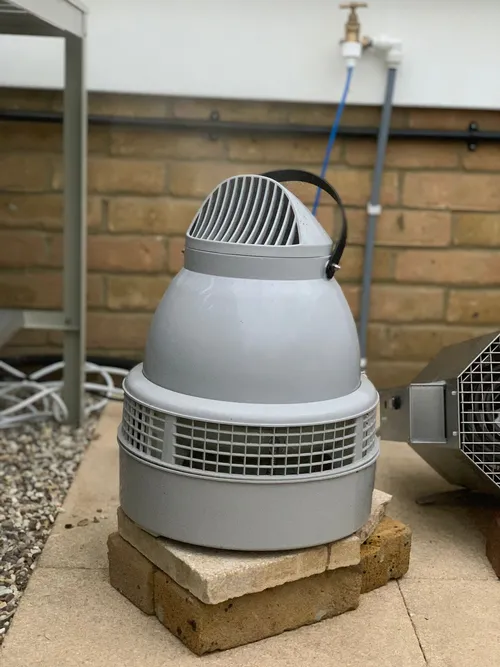 02. My hydrofogger, used to keep summer temperatures down and humidity high
 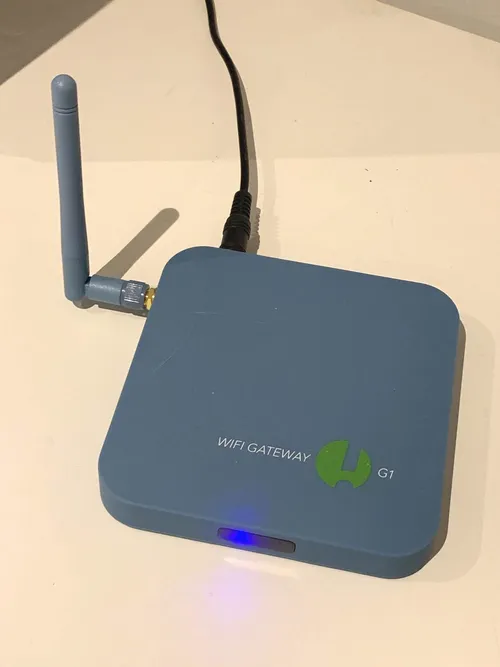 03. My SensorPush Gateway base station, used for remote monitoring of conditions
 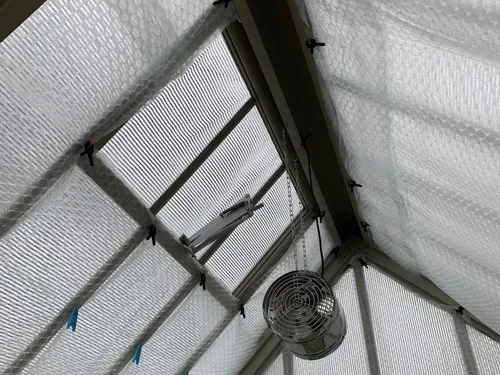 04. My roof vents and circulation fan
 In short, my setup was flawed in that it had a Single Point of Failure: the RCD.
2. Electricity, RCDs, and waterproof sockets
Short of buying a generator, there’s little you can do to prepare for a full powercut. (“We’re not buying a generator” - my wife, 2020). For a hobbyist in the UK, the best you can really do is invest in a gas heater and hope any outages doesn’t last long. But what you can do - and I’d highly recommend this - is identify and tackle the other potential causes of failure in your setup. This could be fixing a single point of failure, as in my case, or simply purchasing spare parts for critical components to enable a quick repair (thanks to Jeff Shafer for this tip).
In the case of my RCD, my approach has been to rewire my greenhouse to ensure that if a device malfunctions, only the socket it’s plugged into will be affected. This involved:
- hiring an electrician to run a separate, non-RCD protected electrical supply from my consumer unit (CU) to my greenhouse. This new circuit has its own switch on the CU.
- replacing my existing waterproof sockets with models that have individual RCDs built-in, thus avoiding the all-or-nothing situation I found myself in over winter.
In effect, this gives me a dedicated electricity supply that won’t trip all at once.
Click on any photo to zoom in. Use arrow keys or swipe to navigate.
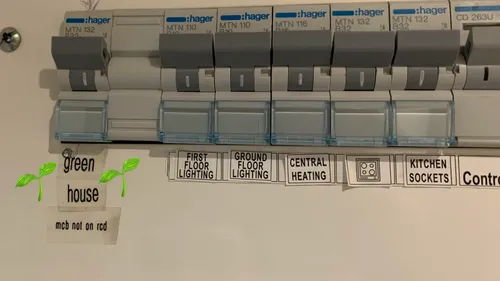 01. The new switch on my consumer unit
 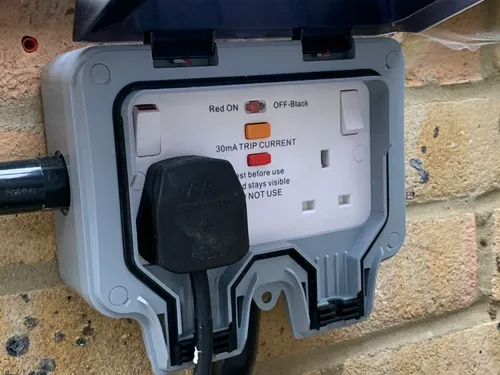 02. Mains socket with integrated RCD
 Note that if your home was built or rewired recently, your CU might have separate RCBOs (Residual Current Circuit Breakers with Overcurrent Protection) protecting each circuit, instead of a single catch-all RCD. While this would prevent a problem in your greenhouse from wreaking havoc on the rest of your home, one faulty heater could still cause your whole greenhouse to be without power. In any case, simply replacing existing power outlets with individually-protected RCD sockets is not sufficient: failure of a single device would cause each of your RCDs to trip, both the one in the socket and the one upstream in the CU.
For this reason, I think a dedicated electricity supply with individually RCD-protected sockets is the safest and most reliable option for a heated greenhouse. Whether or not this approach is practical for you depends on how far your greenhouse is from the CU, not to mention how much of your plant budget you’re willing to part with to pay for an electrician. If you’re only just getting started on your greenhouse project, I would highly recommend factoring this kind of isolated electrical supply into your budgeting!
As Michael Kevin Smith said in our Q&A, you should be prepared to spend at least as much on your grow space as you do on plants. Better safe than sorry.
For me, the Scotland-based greenhouse supplies company Simply Control has been a lifesaver. Their equipment is top-notch, and I’d highly recommend checking them out.
3. How to use a gas heater in a greenhouse
Whether you choose electricity or gas as your primary heating option is partly down to personal preference. I know several growers who rely on gas as their primary source of heat in winter, and by shopping around, it’s quite possible that your running costs will be cheaper than using electricity. If you have a large volume of air to heat, then these savings could be considerable.
For me, the modest size of my greenhouse combined with the convenience of electricity means that I instead rely on gas as my backup option. I’m far from an expert here, so I owe thanks to fellow UK Nepenthes grower Matt Richardson for his input on this subject. Any mistakes here are mine, and not his.
When buying a gas heater, you should look for one which is designed for greenhouses and that is thermostatically controlled, meaning it can be set to ignite when the temperature of a sensor drops below a certain threshold. These heaters use Piezo ignition, meaning they’re not reliant on mains electricity to ignite. Once they’ve been set up, a very small pilot light runs constantly and the gas only properly starts flowing once temperatures drop below 10°C (or whatever you’ve set the thermostat to).
Click on any photo to zoom in. Use arrow keys or swipe to navigate.
.4n1GgDrM_2lrdeL.webp) 01. Nepenthes veitchii x platychila (BE)
01. Nepenthes veitchii x platychila (BE) 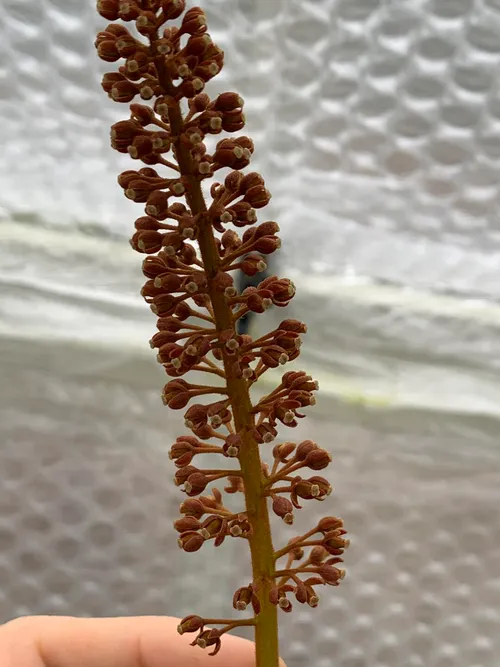 02. Nepenthes inflorescence
 .DXqa4X1u_ZGlFge.webp) 03. Nepenthes lowii seedling (SG)
03. Nepenthes lowii seedling (SG) .yefYgNRH_Z17Vnv6.webp) 04. Nepenthes spathulata x lowii (SG)
04. Nepenthes spathulata x lowii (SG) I use a basic 2kW propane gas heater as a backup in winter when I’m away from home or when temperatures are dangerously low. In the UK, most of the heaters I’ve seen come with a screw-on regulator and require a Calor propane canister. These are bright red, are available in 6kg, 13kg, 19kg, and 47kg sizes, and can be bought from garden centers, garages, and home improvement stores like B&Q.
In the UK, the first time you buy a Calor canister, you’ll be required to fill out a refill agreement. This is basically a form which states the canister remains Calor’s property - you’ll need to make a one-off payment to effectively ‘rent’ it. Once your canister is empty, you can then exchange it for a full one at any Calor reseller for just the price of the gas (about £30-40 for 19kg).
Click on any photo to zoom in. Use arrow keys or swipe to navigate.
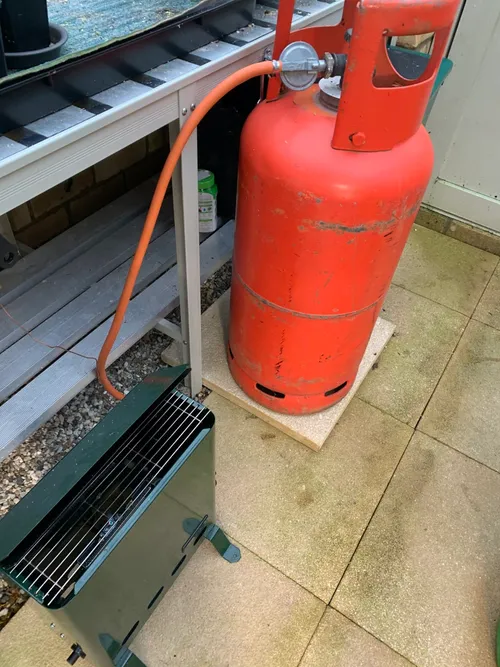 01. Propane heater with temperature probe and 19kg canister
 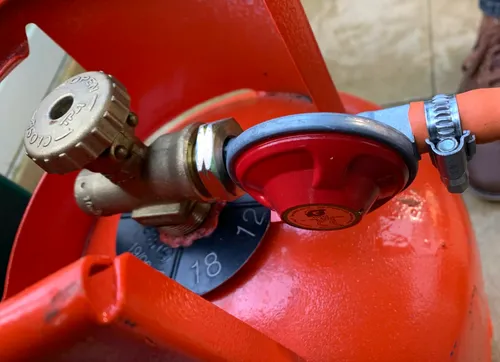 02. Calor screw-on 37mbar propane regulator
 When installing the heater, follow the installation instructions carefully and conduct the soapy water test to check for leaks. Gas fires require an air source, especially if your greenhouse is well sealed with bubblewrap. A pipe or duct leading from outside to near the base of the fire (not pointing directly at it, to avoid blowing out the pilot!) is sufficient for most setups.
When positioning the sensor (a copper thermostatic probe), you should try to mount it far away from - and at a level lower than - the top of your heater. Placing the probe directly above the fire (as is often recommended) will cause the heat to be cut long before most of the greenhouse feels any benefit. As you might expect, air circulation is important if you’re to avoid cold spots.
You’ll need to experiment to find the optimal position, noting the ambient temperatures at which the fire ignites. Bluetooth sensors such as SensorPush (available on Amazon) can be useful here, since they enable you to monitor conditions at various locations and levels in your greenhouse. Thoroughly testing your heater like this means that if - or rather when - your electricity supply cuts out and you become reliant on gas to heat your greenhouse without a circulation fan, convection currents will heat the space top-down, and everything will be kept at a safe minimum.
Click on any photo to zoom in. Use arrow keys or swipe to navigate.
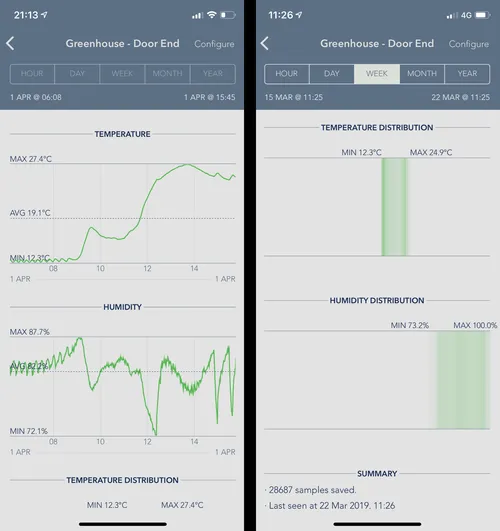 01. The SensorPush app enables you to monitor temperature trends as well as the minimum and maximum
 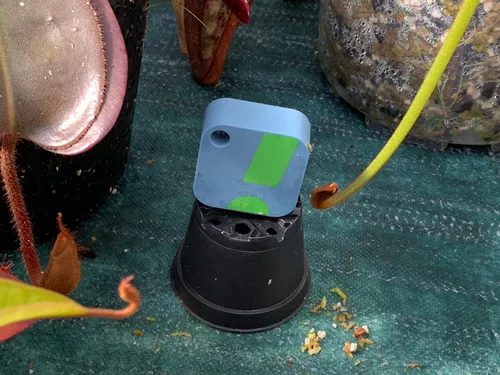 02. I use a second sensor to compare conditions in different areas of the greenhouse
 Note that most propane canisters don’t have a dial showing the remaining gas level. You could buy an auto switchover kit - these allow you to connect two canisters and automatically change over when one is depleted. Personally I’ve never used these, and instead rely on the old ‘hot water trick’ to check the level of gas in a canister. Simply pour hot (not boiling) water down the side of your canister, then run your hand down the canister to find where the warmed steel becomes cold - that is the level of liquefied gas remaining.
Finally, a word on safety: gas heaters have a reputation among some growers as being highly dangerous. While it’s important to remember that you are deliberately setting fire to something explosive - and so should be rigorous when it comes to safety and consult an expert if ever in doubt - it’s also worth mentioning that modern gas heaters are fitted with multiple safety devices designed to prevent dangerous situations from arising. A thermocouple sits in the pilot flame and keeps the gas supply open. Should the pilot flame be extinguished, the thermocouple will sense the drop in temperature and automatically close the gas valve. This will prevent a dangerous accumulation of unburnt gas. Additionally, an Oxygen Depletion System (ODS) extinguishes the pilot flame if CO2 levels rise above a certain threshold. Together, these form an effective safety mechanism.
4. Microclimates & monitoring
Having grown in terrariums for many years - and being of an obsessive nature - I was naturally inclined upon getting a greenhouse to try and keep conditions as predictable and as stable as possible. Within reason, this is a good approach: plants, especially Nepenthes, don’t like sudden changes, and maintaining steady conditions necessitates careful measurement, something that I’m still a big advocate for. But in a greenhouse, the degree of control to which I was used is simply not economically or practically feasible.
Click on any photo to zoom in. Use arrow keys or swipe to navigate.
.BuGaxx09_w5GPm.webp) 01. Nepenthes lingulata x veitchii (EP)
01. Nepenthes lingulata x veitchii (EP) .BDFIZHJG_jmHDL.webp) 02. Nepenthes aristolochioides x burkei (BE)
02. Nepenthes aristolochioides x burkei (BE) .DZoSsYoh_2ep6VM.webp) 03. Nepenthes mollis (AW)
03. Nepenthes mollis (AW) .CDV2WSru_ZtsDc0.webp) 04. Nepenthes ephippiata "Hose Mountains" (AW)
04. Nepenthes ephippiata "Hose Mountains" (AW) I’m aware that many people reading this will have years more experience of greenhouse growing than I do - decades, in some cases - and for them, this might sound like I’m stating the obvious. But if you’re heading into your greenhouse project a complete novice, as I was, then hopefully this is helpful advice.
Every piece of equipment you add to your system is another potential cause of failure. Take the tropical thermostat I recommended in my last greenhouse article - while this is a fantastic piece of kit that I’d still recommend highly, I know many growers with stunning collections of beautiful plants who grow just fine without one. The solar gain increases daytime temperatures, and their heater simply provides a baseline minimum of, say, 12°C at night. Some plants may stop growing over winter, especially without supplemental lighting, and some intermediate species may no longer be suitable for your conditions, but you’ll still be able to grow a wide variety of highland species and hybrids.
Click on any photo to zoom in. Use arrow keys or swipe to navigate.
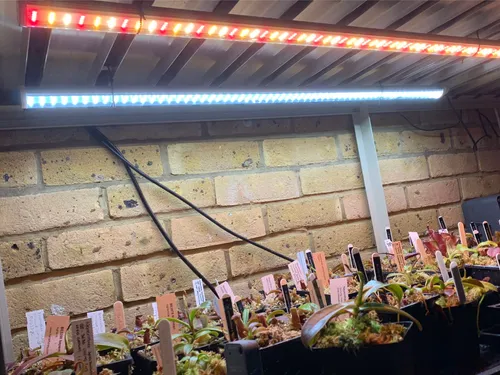 01. Nepenthes seedlings growing beneath my bench under LEDs
 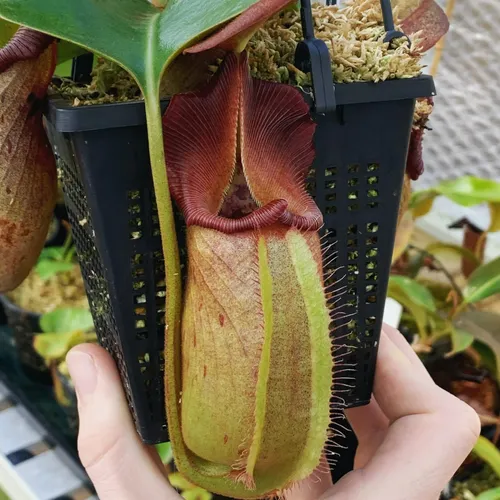 02. Nepenthes robcantleyi enjoying its hanging basket
 I’ve found that it’s often possible to improve your success with a particular plant simply by taking advantage of your space’s microclimates and by learning how to effectively offset extreme weather conditions. This can be done cheaply, without making any substantial investments in your growing space.
- In summer, the area below my benches it is often 2-5°C cooler than above the benches. I’ve now installed LED tubes to illuminate this area, and I use it to grow both seedlings and tricky ultra highlanders like N. villosa.
- Last year’s 37°C heatwave taught me a lot about managing heat. While my 50% shade cloth and autovents certainly helped, I found that wedging the door open - while also ramping up my hydrofogger and misting regularly to compensate for the loss in humidity - kept temperatures manageable without an expensive swamp cooler or aircon unit.
- Winter has given me lessons for the growing season. If these plants can handle the gloom of British winter days - barely 8 hours of light through drizzle and cloud - for months on end, then shrouding your greenhouse in a high grade of shade cloth (70/80%) to get them through a heatwave won’t do them any harm. Far less than repeated 35°C days would, anyway.
- Monitoring has also helped me identify cold spots in winter. The back corner of one bench gets very chilly in winter - not only is it furthest from my heater, but I think one of my fans was actually creating an updraught which caused some plants to struggle. My sensors meant I could fix the problem before losing any plants.
If you’d like more tips on greenhouse growing, I’d recommend reading my Q&As with Simon Lumb, Jeff Shafer, and David Durie.
Thanks for reading! I hope this has been useful, let me know when you think in the comments.
