
Time to welcome another guest author to my blog!
It’s been a couple of years since David shared his experience visiting Jeremiah Harris in Colorado, and since Francis wrote his profile of Nepenthes peltata. This time round, I wanted to share a practical, hands-on tutorial that’s not focused on Nepenthes!
I first spotted Megan’s incredible displays and planters on Instagram, where she goes by the handle @carnivorous_plant_girl. She’s a fellow carnivorous plant enthusiast and writer from the UK who grows a wide variety of genera. Megan’s kindly agreed to share a tutorial here on my blog demonstrating how to build an attractive, low-maintenance display of hardy carnivorous plants that can be kept indoors or in an unheated greenhouse year-round.
Be sure to subscribe to Tom’s Carnivores for more articles like this. Thanks again for reading, and enjoy!
Ever since I was little I have enjoyed getting involved in everything creative, from painting to DIY projects. I loved to use my imagination. It was no surprise that when I first got into horticulture one of my favourite things to do was make planted containers. Growing carnivorous plants for a couple of years already, I thought why not create something with these too?
Click on any photo to zoom in. Use arrow keys or swipe to navigate.
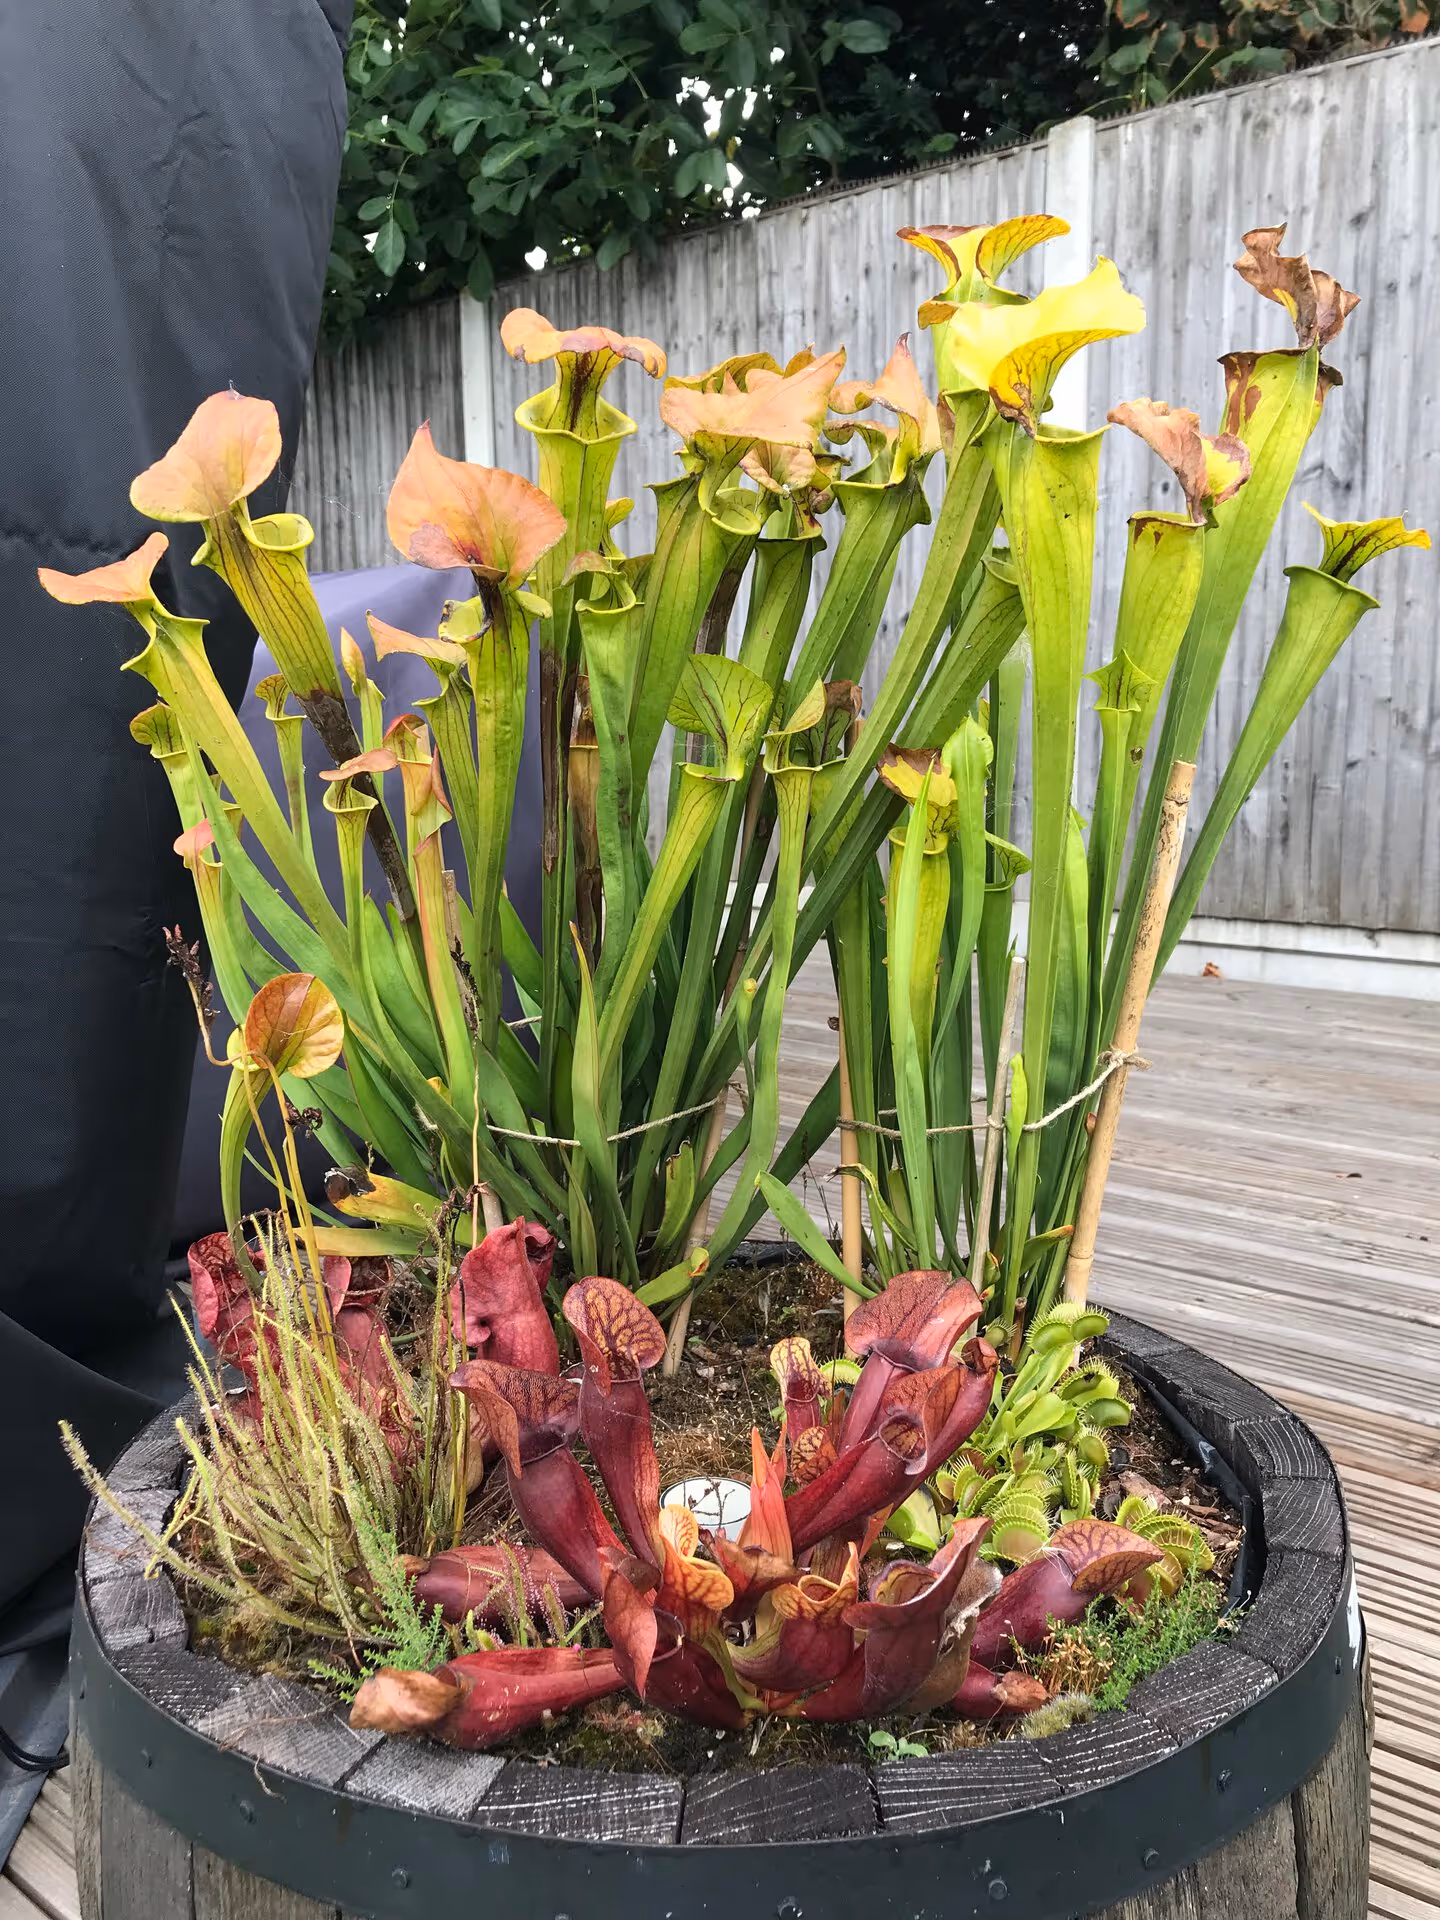 Bog barrel, with S. flava, S. purpurea, Dionaea, and Drosera
 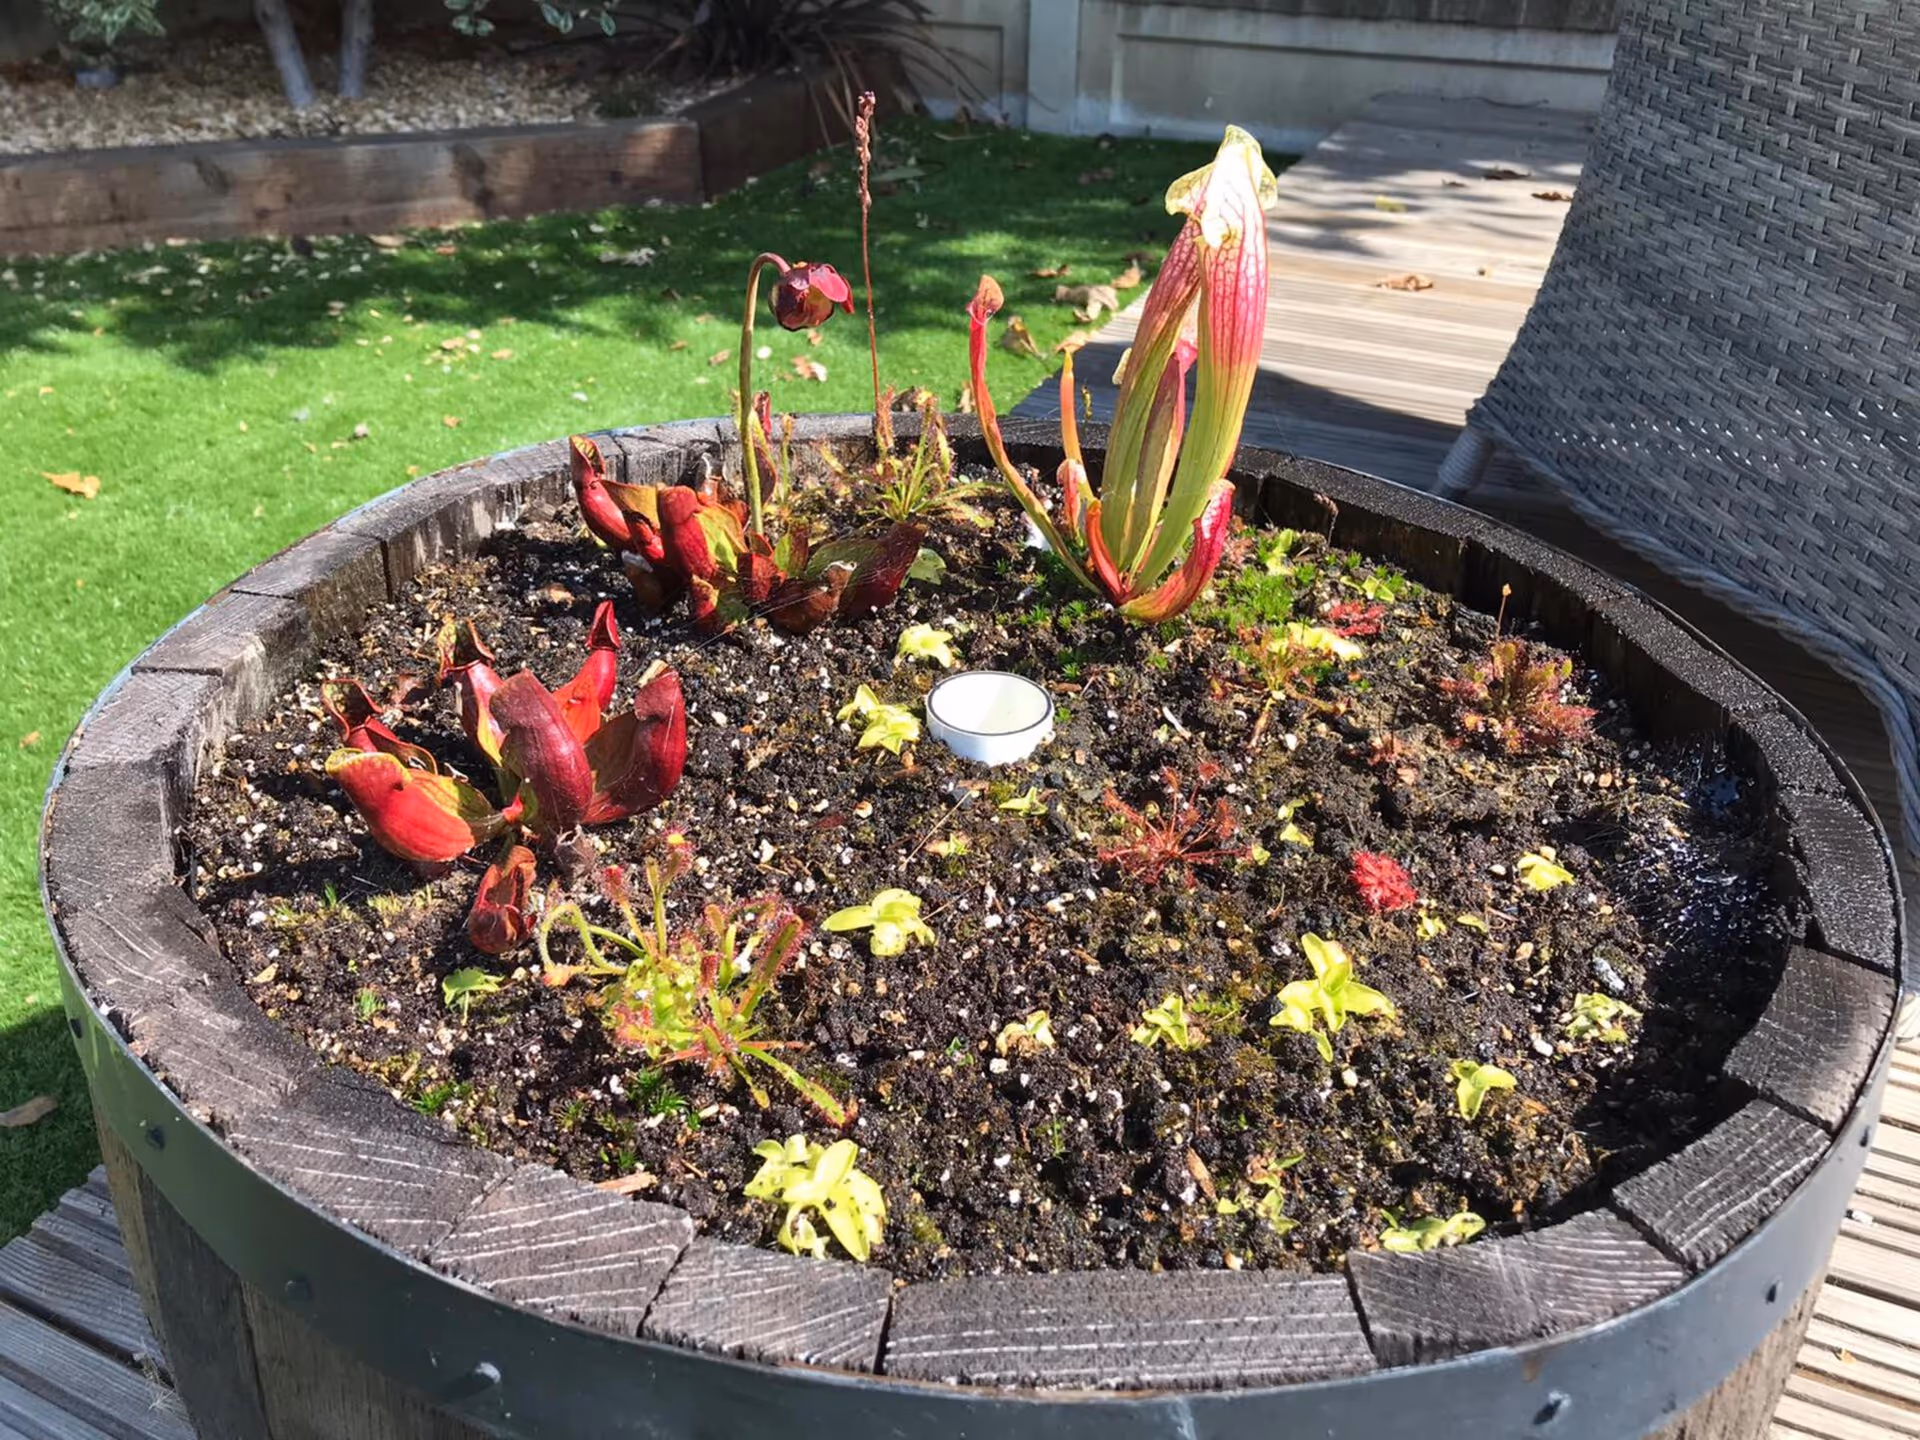 Outdoor bog barrel with Sarracenia, Pinguicula, and a variety of Drosera
 Over many years of growing and collecting carnivorous plants I’ve made a series of planted containers and outdoor bog barrels to create displays with different carnivorous plants. I’ve really enjoyed the experimentation which has come with this type of planting, seeing what works where, and how it creates an impact.
My first planter I nicknamed ‘the bunny bog’, due to the small rabbit ornament which I placed within it. It was a simple yet effective way to display the first flytraps I purchased. In the height of summer, the flytraps and odd D. capensis would cascade around the ornament making a beautiful display. It is my oldest planter of 7 years, and recently I divided it due to the mass of plants within the pot!
Click on any photo to zoom in. Use arrow keys or swipe to navigate.
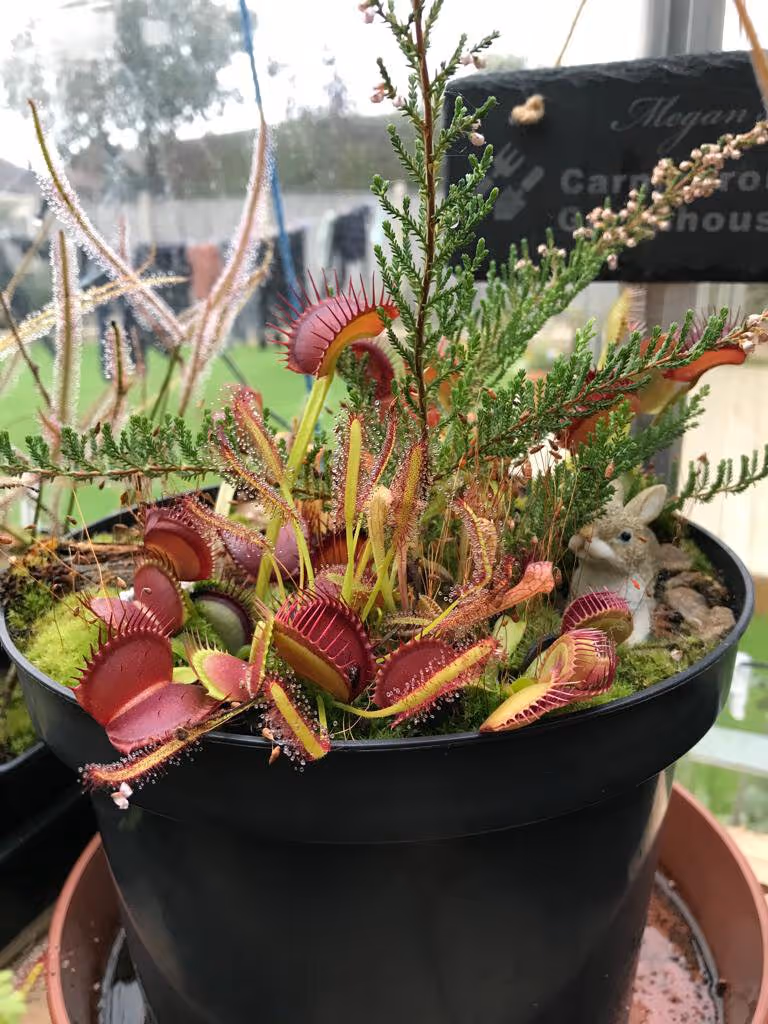 The bunny bog in the height of summer
 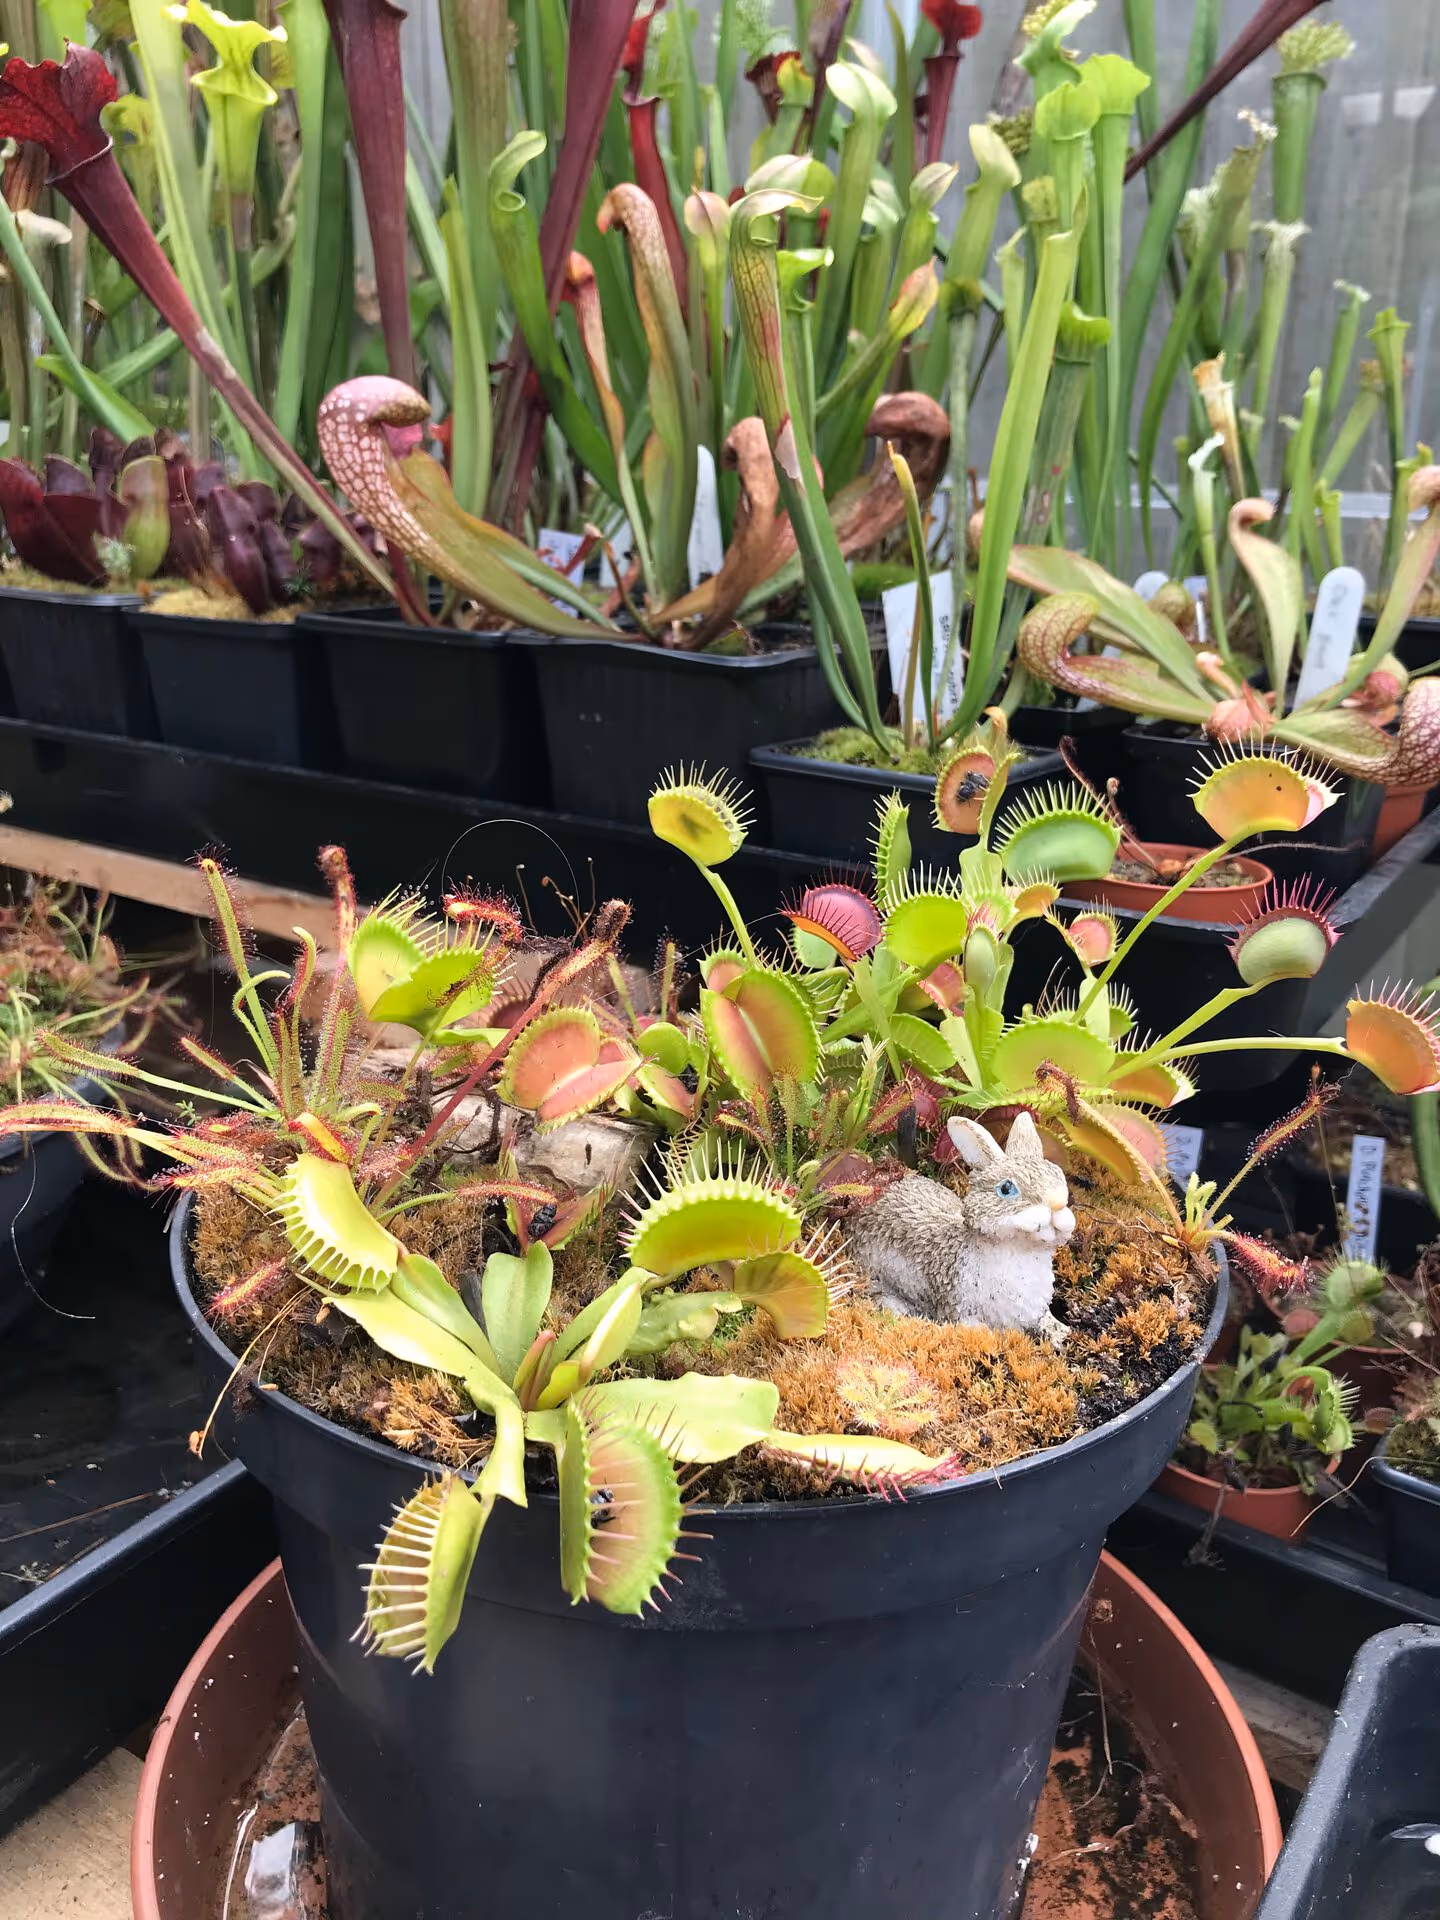 The bunny bog
 It’s been lovely to hear feedback from people over the years who have enjoyed my displays, so when Tom kindly asked me to feature in his blog I couldn’t say no!
So, I have written up this simple ‘How To’ guide for anyone who would like to create their own carnivorous planter.
For this demonstration I have chosen to create a simple decorative planter to show off easy and hardy carnivorous plants which can be grown indoors or in an unheated greenhouse or similar. This guide is adaptable - if you wish to use a different planting style, it should still help you take the first steps towards creating something beautiful!
Materials
- Pot / planter
- Your chosen carnivorous plant potting mix (I use a mixture of peat and perlite)
- Plants of your choice
- Decorative rocks / other items (optional)
- Moss for decoration (optional)
You can be as simple or as extravagant as you like with your planter, so additional items are up to you - you can make a stunning display regardless!
Preparation before planting
Pot selection
Before planting it’s helpful if you have a rough idea of what you want to create, so that you can select a suitable pot and plants. Furthermore, it’s important to consider where your planter will live. For example, if you select a pot with no drainage holes then I wouldn’t recommend keeping it inside or anywhere with low airflow - this risks mold and rot. If you’d like to create a bog like my outdoor bog barrels which are lined with pond liner and have no drainage, then I would suggest selecting cold hardy, temperate plants which can live outside year round.
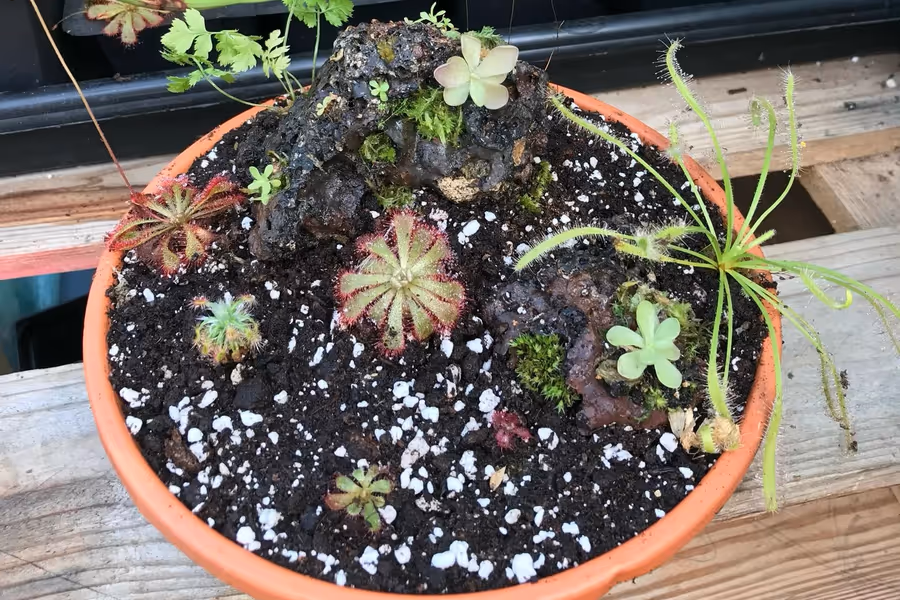
I like to use shallow bulb planters with a large circumference as they allow for spacious planting to create a small landscape. My ‘sundew cottage’ was created in a large bulb container, and similarly for this example I will be using an 18cm bulb pot. But you could equally use a standard plant pot of your chosen size and focus on planting rather than the pot itself.
Click on any photo to zoom in. Use arrow keys or swipe to navigate.
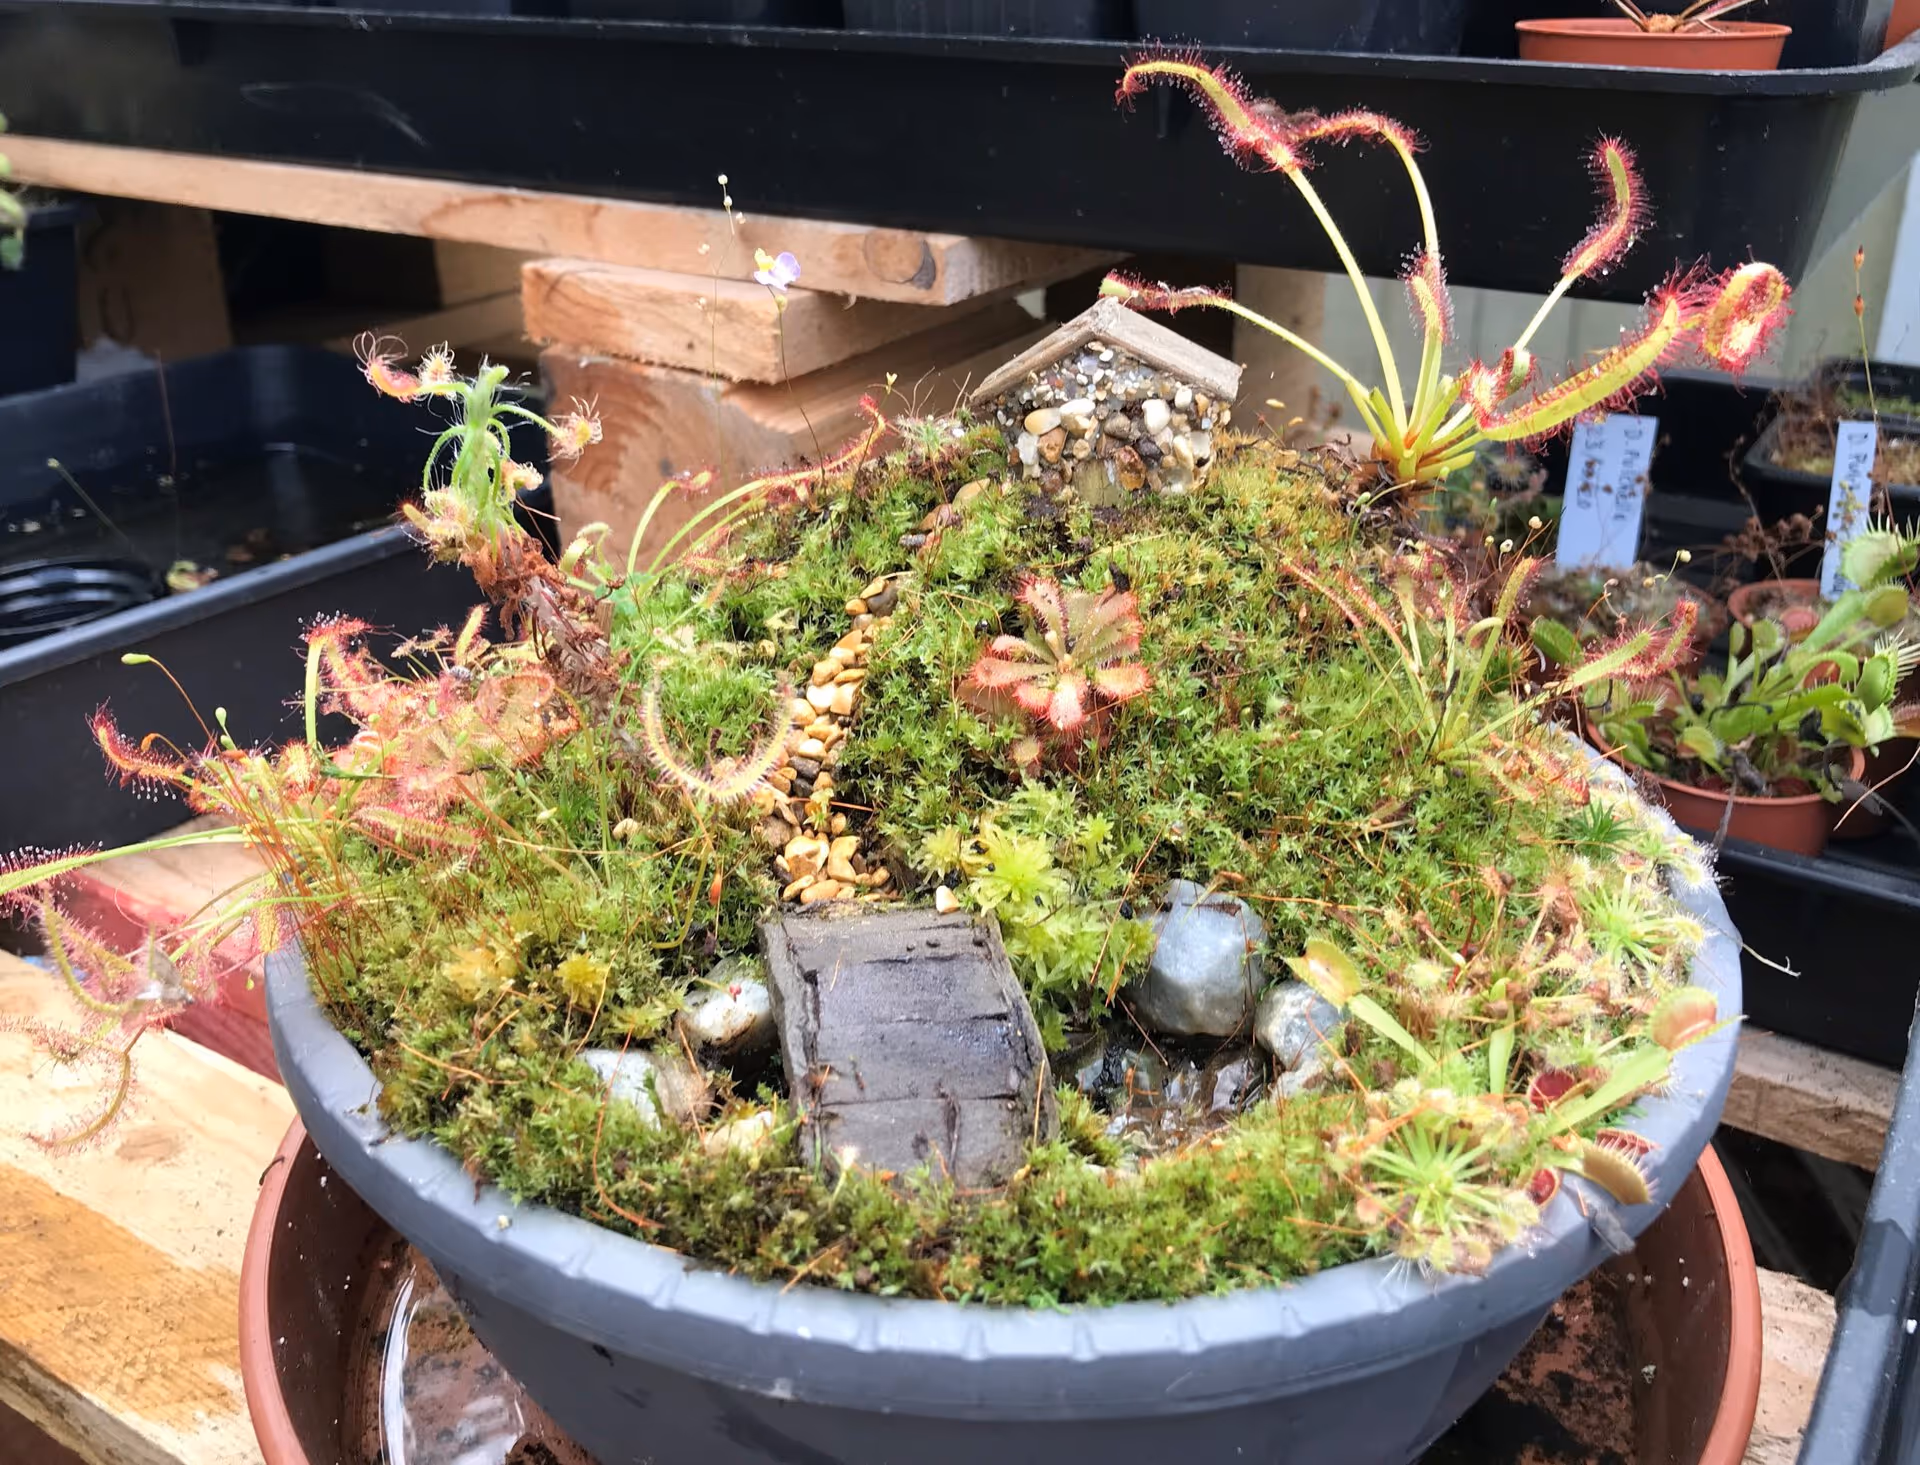 The sundew cottage display
  The sundew cottage display_close_up
 Plant selection
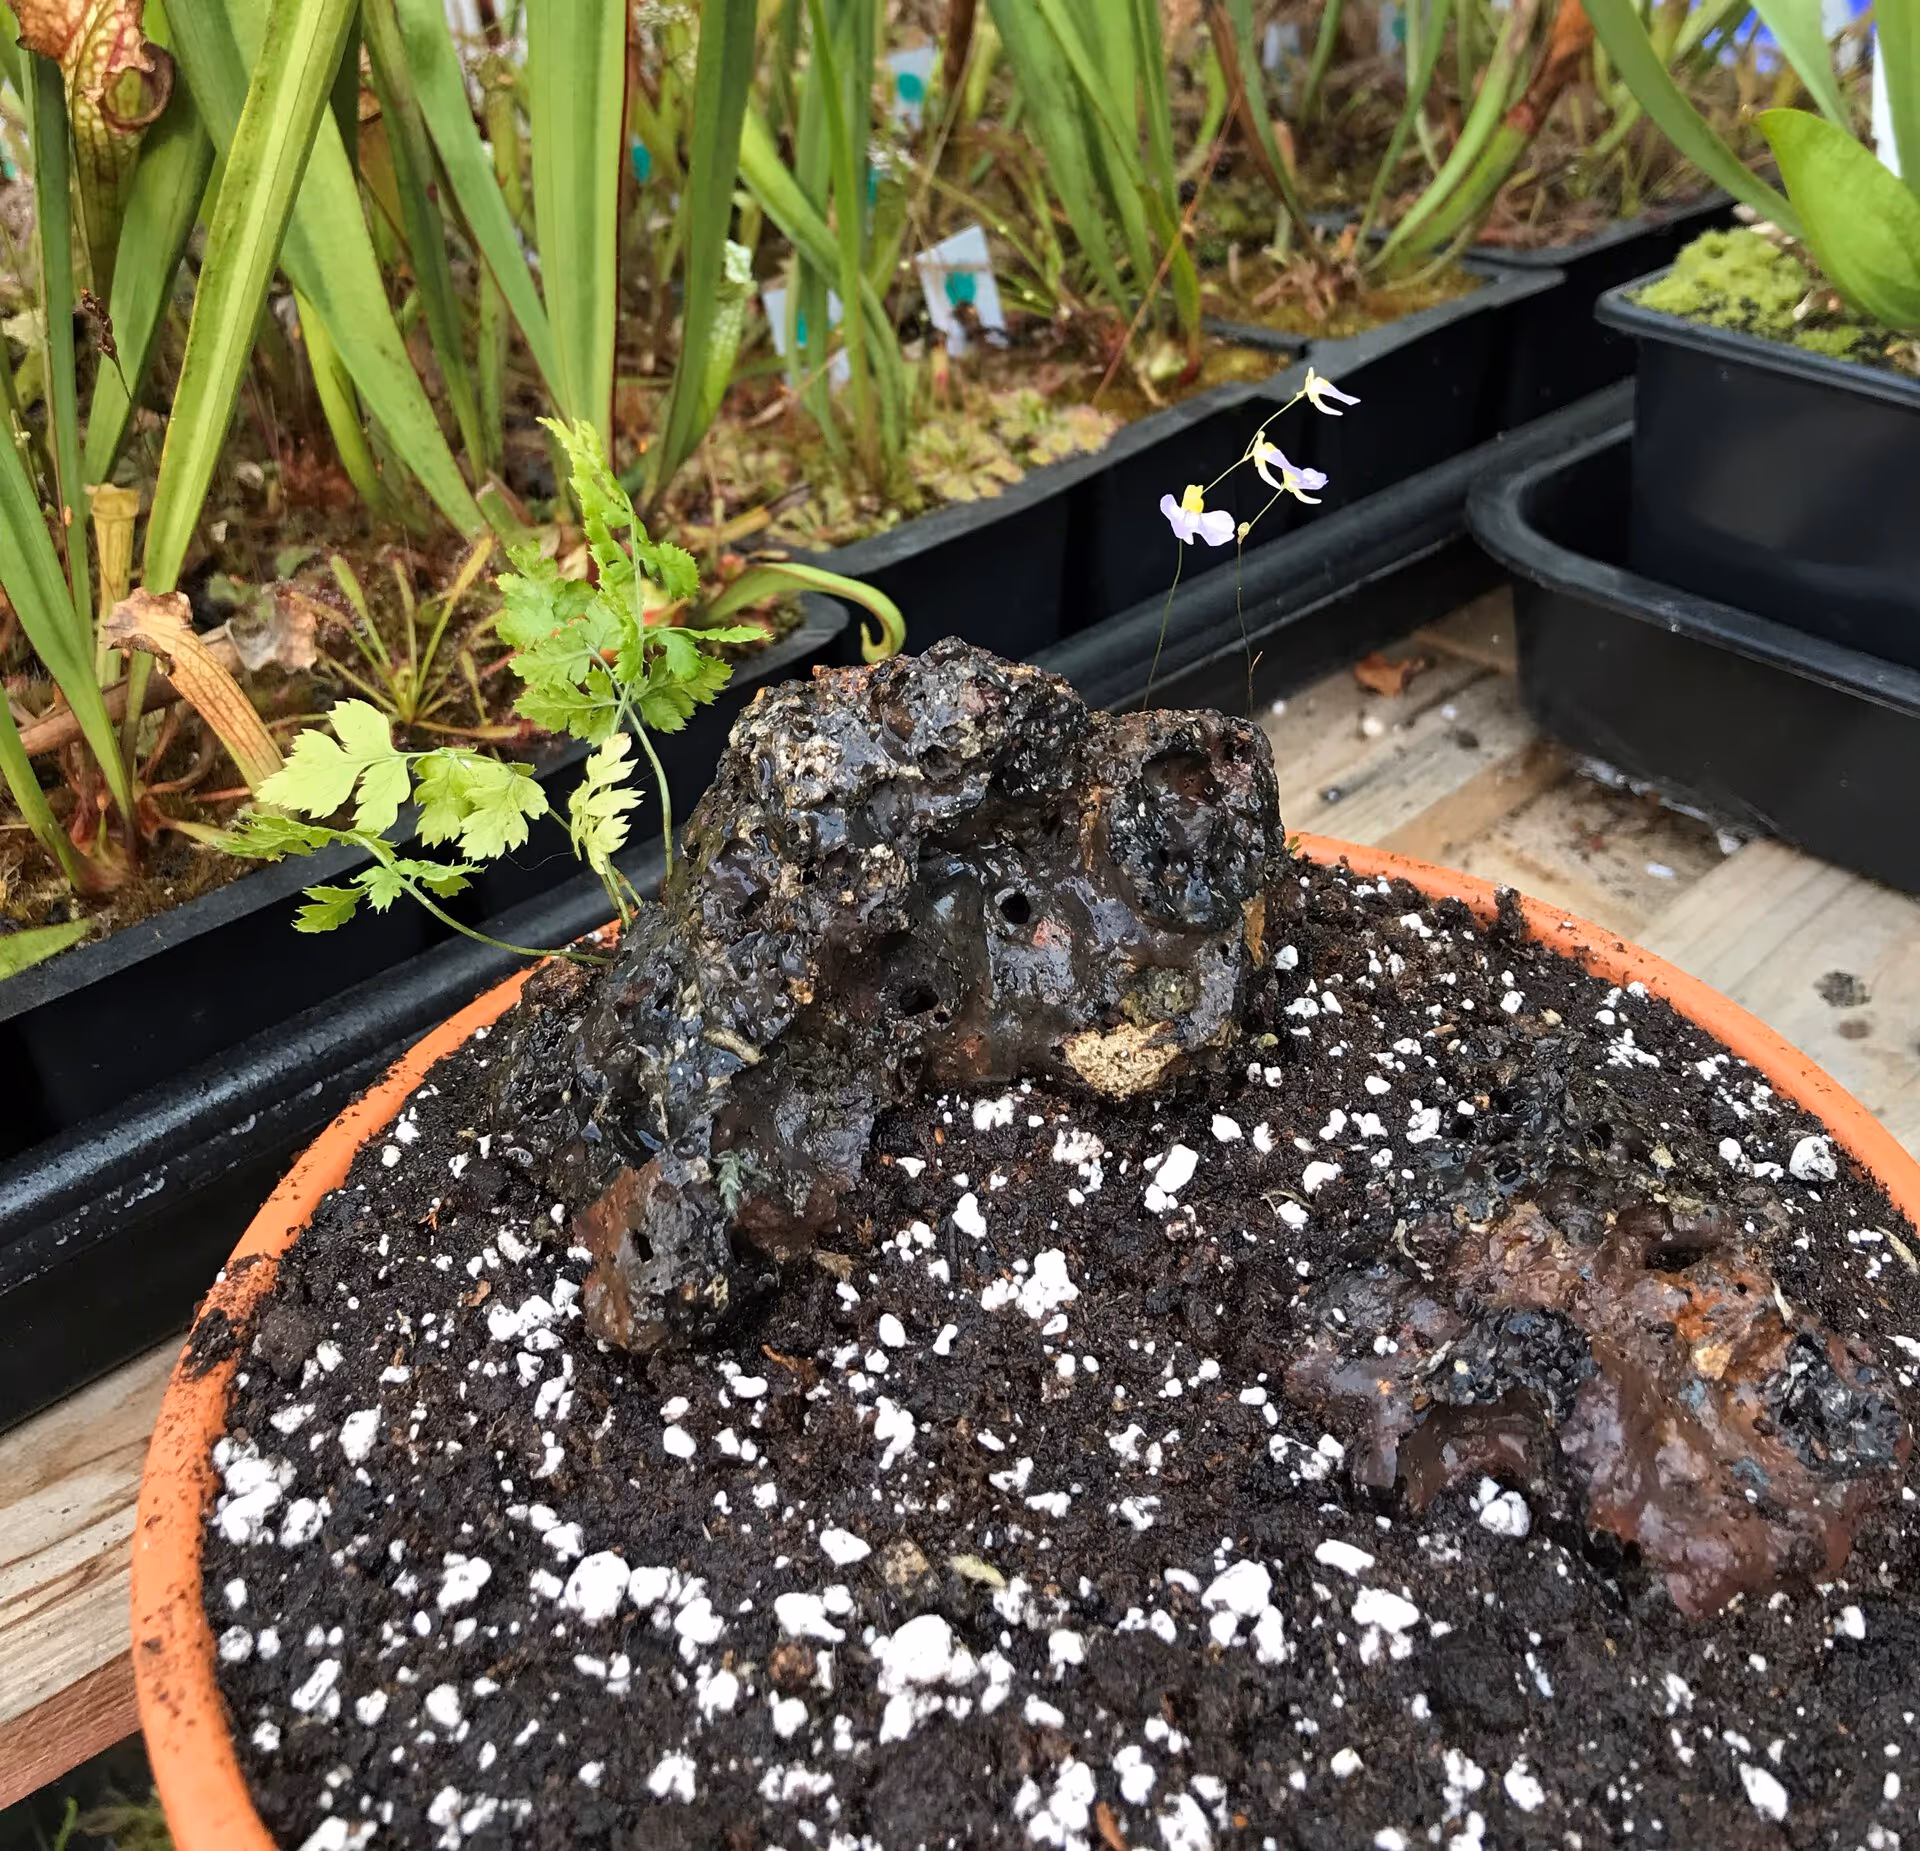
You may already have an idea of what plants you want to use before you select your pot - either way round is fine. I decided to select several hardy species of sub-tropical Drosera (sundews) including D. capensis ‘alba’, D. spatulata, D. aliciae, as well as the bladderwort Utricularia bisquimata. I like to have a good variety of plants, as well as different sizes in order to see what will work best when planting.
For indoor planters I suggest using sub-tropical Drosera (sundews), terrestrial Utricularia (bladderwort), Mexican Pinguicula (butterworts_) or easy-growing Nepenthes species (tropical pitcher plants / monkey jars).
For outdoor planters you can use a range of temperate Drosera species, Sarracenia (North-American pitcher plants), Dionaea muscipula (Venus flytrap) or temperate Pinguicula.
I keep my plants in my unheated greenhouse, and due to the hardiness of sub-tropical Drosera and terrestrial Utricularia I can keep them in the greenhouse year-round. The sundews often die down to the roots during winter but will come back in spring - you can therefore also use sub-tropical Drosera and Utricularia if you are planting in an unheated greenhouse, cold frame or similar.
Furthermore, you may wish to use plants other than carnivorous plants for your planter. Some good companion plants include ferns, heathers, pipeworts and bog orchids such as Pogonia.
Additional decorative items
It is optional whether you use decorative items in your displays, but if you do decide to use them, it is important to select items that will not affect your carnivorous plants.
For example, when using decorative rocks it is important to select rocks which will not leach minerals into your media. Always soak rocks and stones for an hour or two before use to get rid of any dirt or insects which might be on the surface or within pores if you are using lava rocks. This also applies to other decorative items that you may wish to use.
Click on any photo to zoom in. Use arrow keys or swipe to navigate.
 My chosen materials: planter and lava rock
 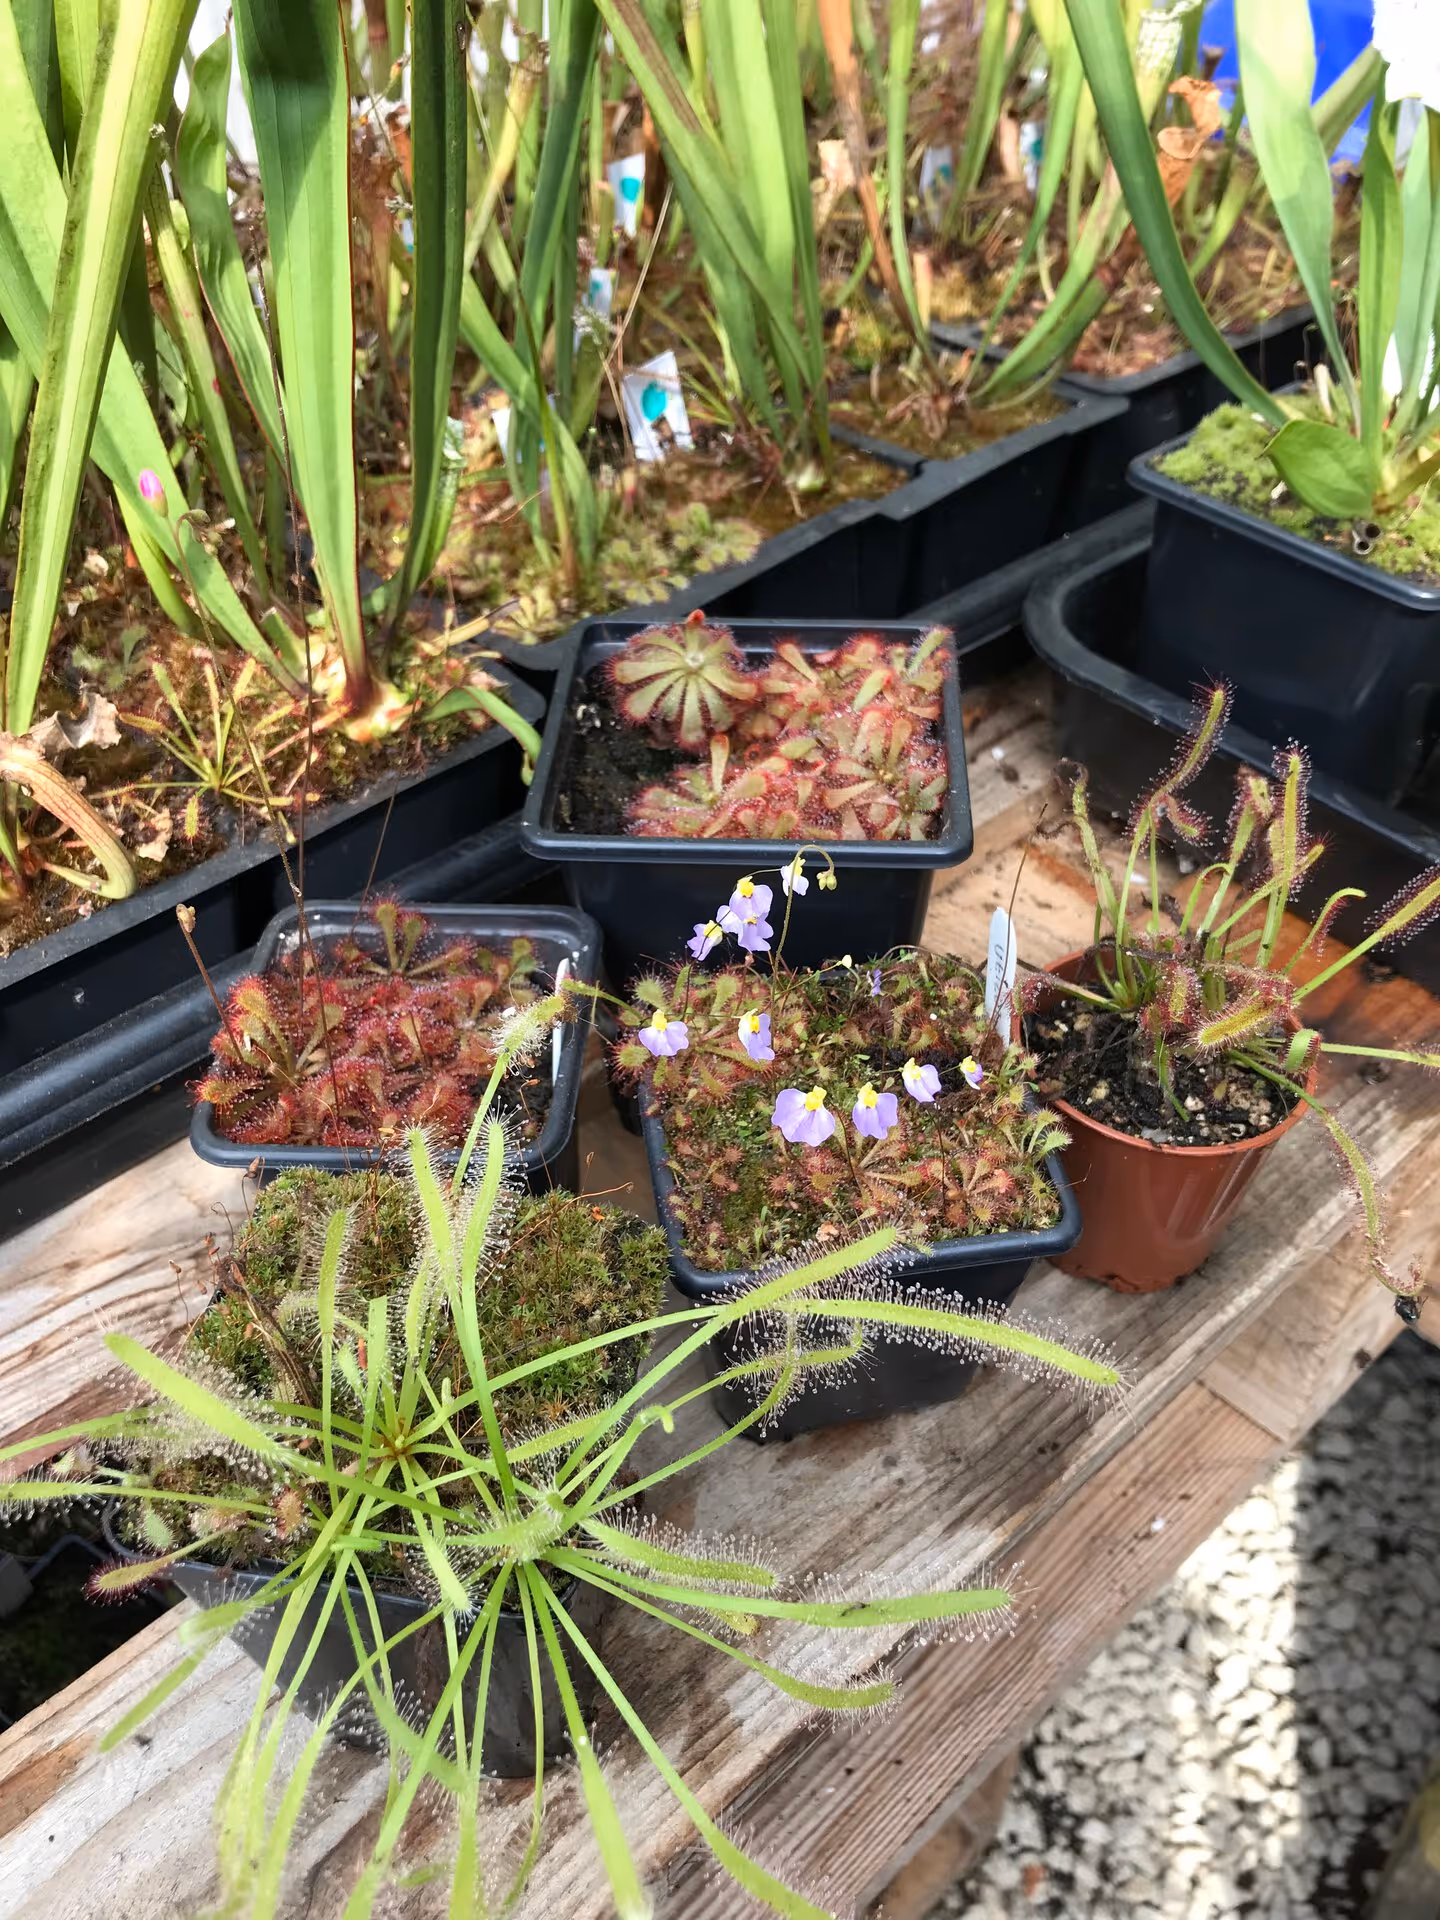 Plants I have selected for the display
 Planting
So after gathering all your equipment and plants, you are ready to start planting it up!
Start by filling your pot with your chosen carnivorous plant potting mix. I’ve used a mix of peat and perlite in a 1:1 ratio. I decided I wanted to add height to my landscape, so I selected two small pieces of lava rock for the display, which I originally purchased from an aquarium shop. After soaking the rocks the day prior I placed them on the surface of the soil in roughly the place I would like them. In order to add more height to my planter I added a pile of additional soil where the largest rock would sit before placing it on top.
Creating a small mound is a trick I used when creating my ‘sundew cottage’. When established, it adds texture to the planter, especially when moss grows over it. This is easy to do and will not require additional watering as it absorbs water with the rest of the mix.
Due to the heatwave of our summer I soaked the media before planting due to it being especially dry and crumbly. Planting in damp media is easier when positioning plants and aiding roots.
Click on any photo to zoom in. Use arrow keys or swipe to navigate.
 Fern and Utricularia
 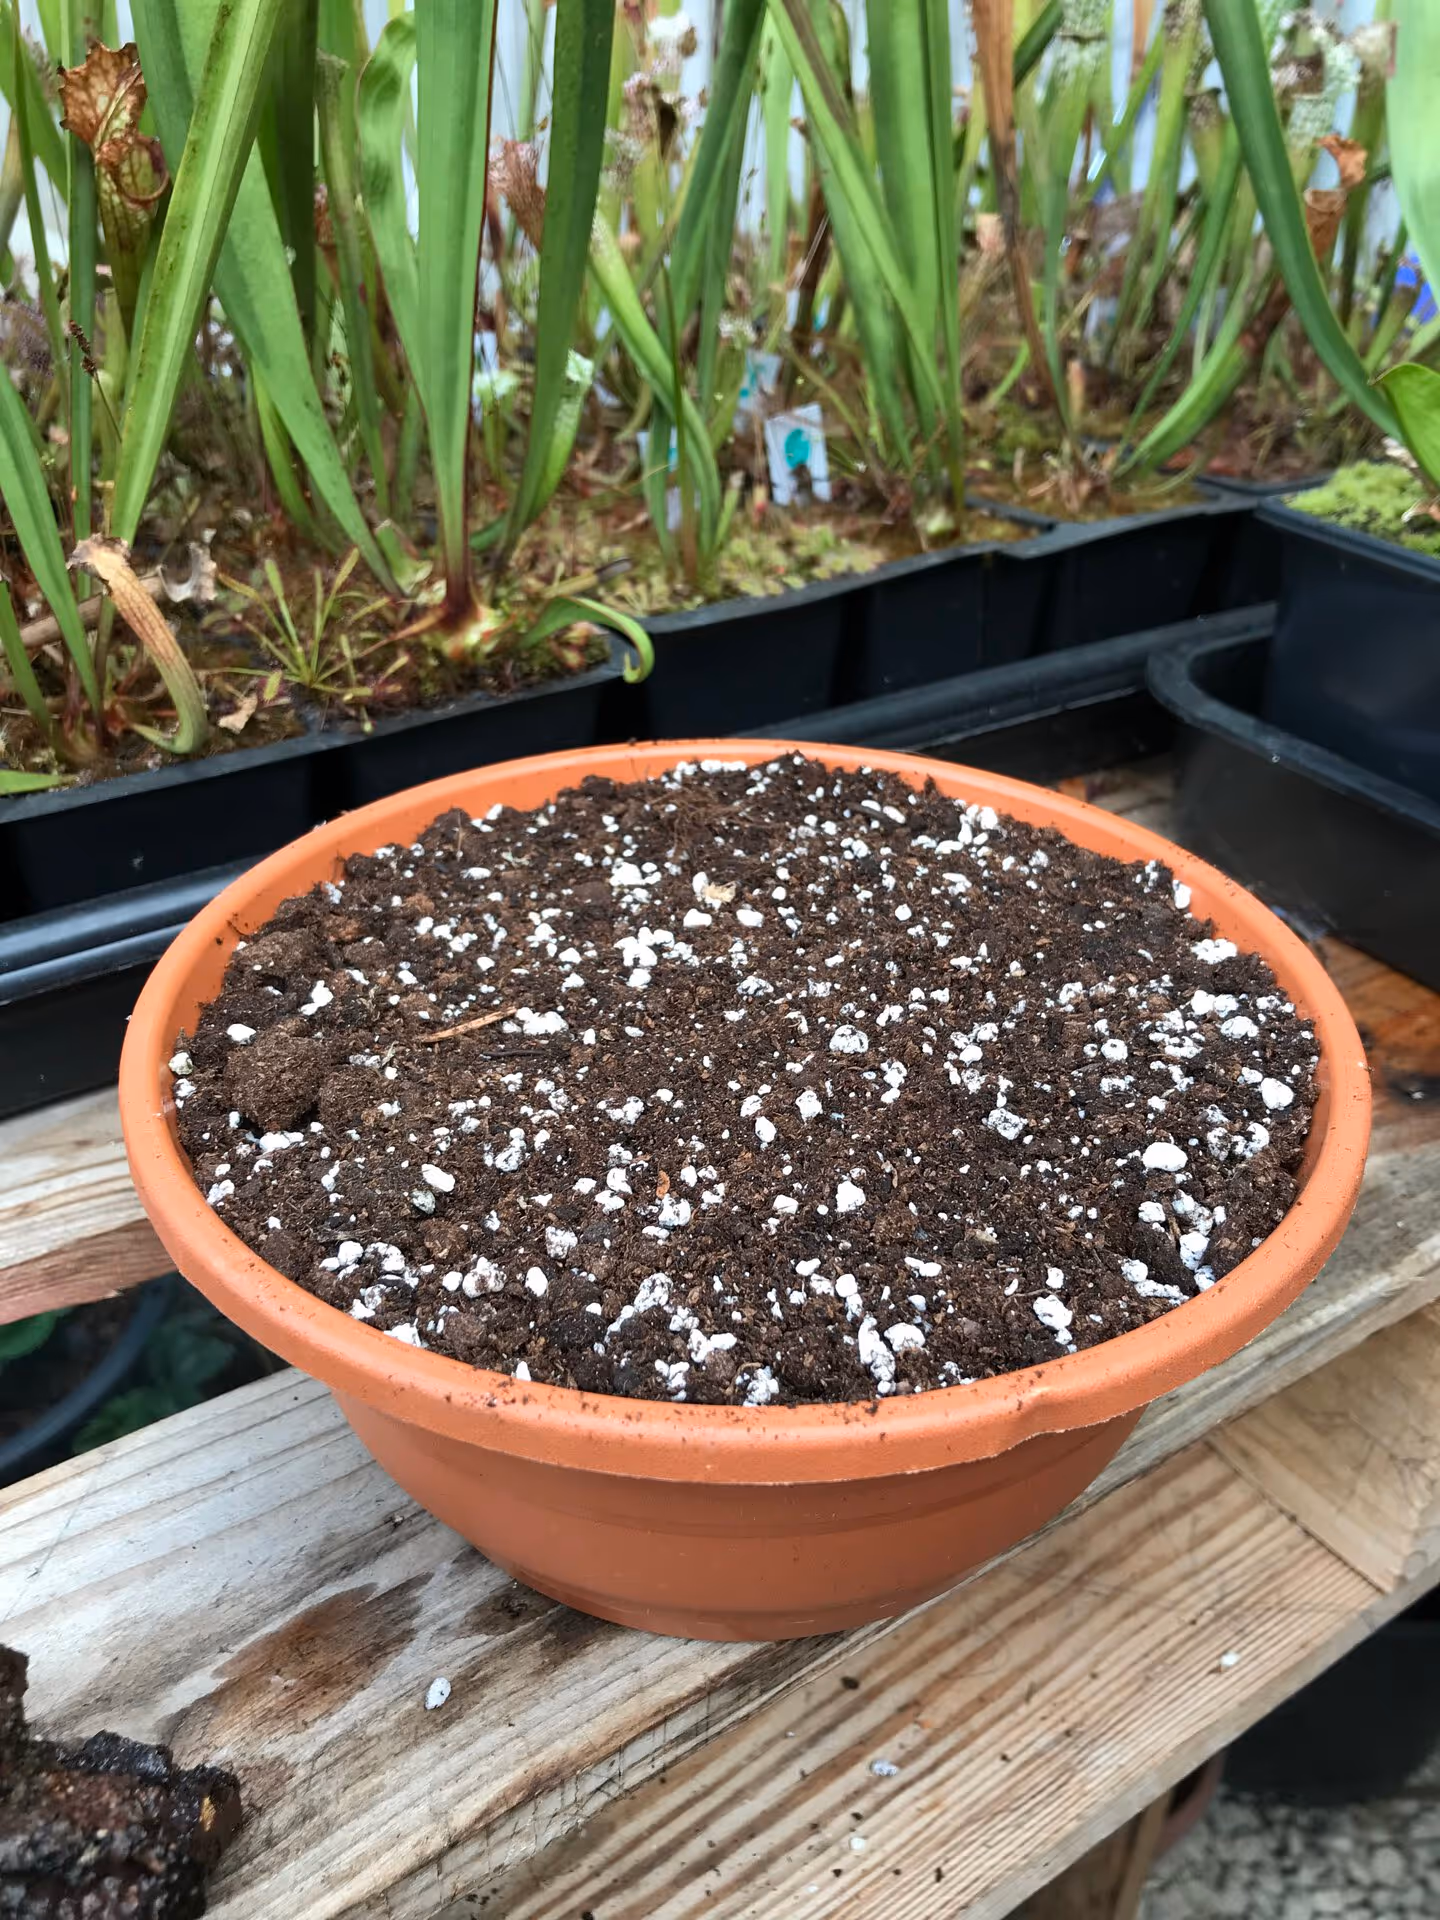 My pot filled with media
 After I’d created my main structure, I could start adding plants. I decided to work from back to front when planting in order to structure the height. Along with carnivorous plants I also used a small fern, which commonly grow in my peat mixes, to use in the back drop along with a small clump of Utricularia bisquimata. This added some beautiful colours, flowers, and height.
Afterwards I moved onto my main Drosera display. One thing to consider when planting is how big the plants you are using will get, or whether they spread. I had considered using multiple Drosera capensis, however when planting I knew it would be best just to use one - they would be the largest thing in the display, and even seedlings would quickly take over.
When using rosette sub-tropical Drosera at the front of the planter, I chose to use a couple of recently germinated seedlings from Drosera hamiltonii and Drosera trinervia. I allowed a decent gap between them in order to give room for them to grow and prevent overlapping and overcrowding.
Click on any photo to zoom in. Use arrow keys or swipe to navigate.
 Drosera capensis alba
 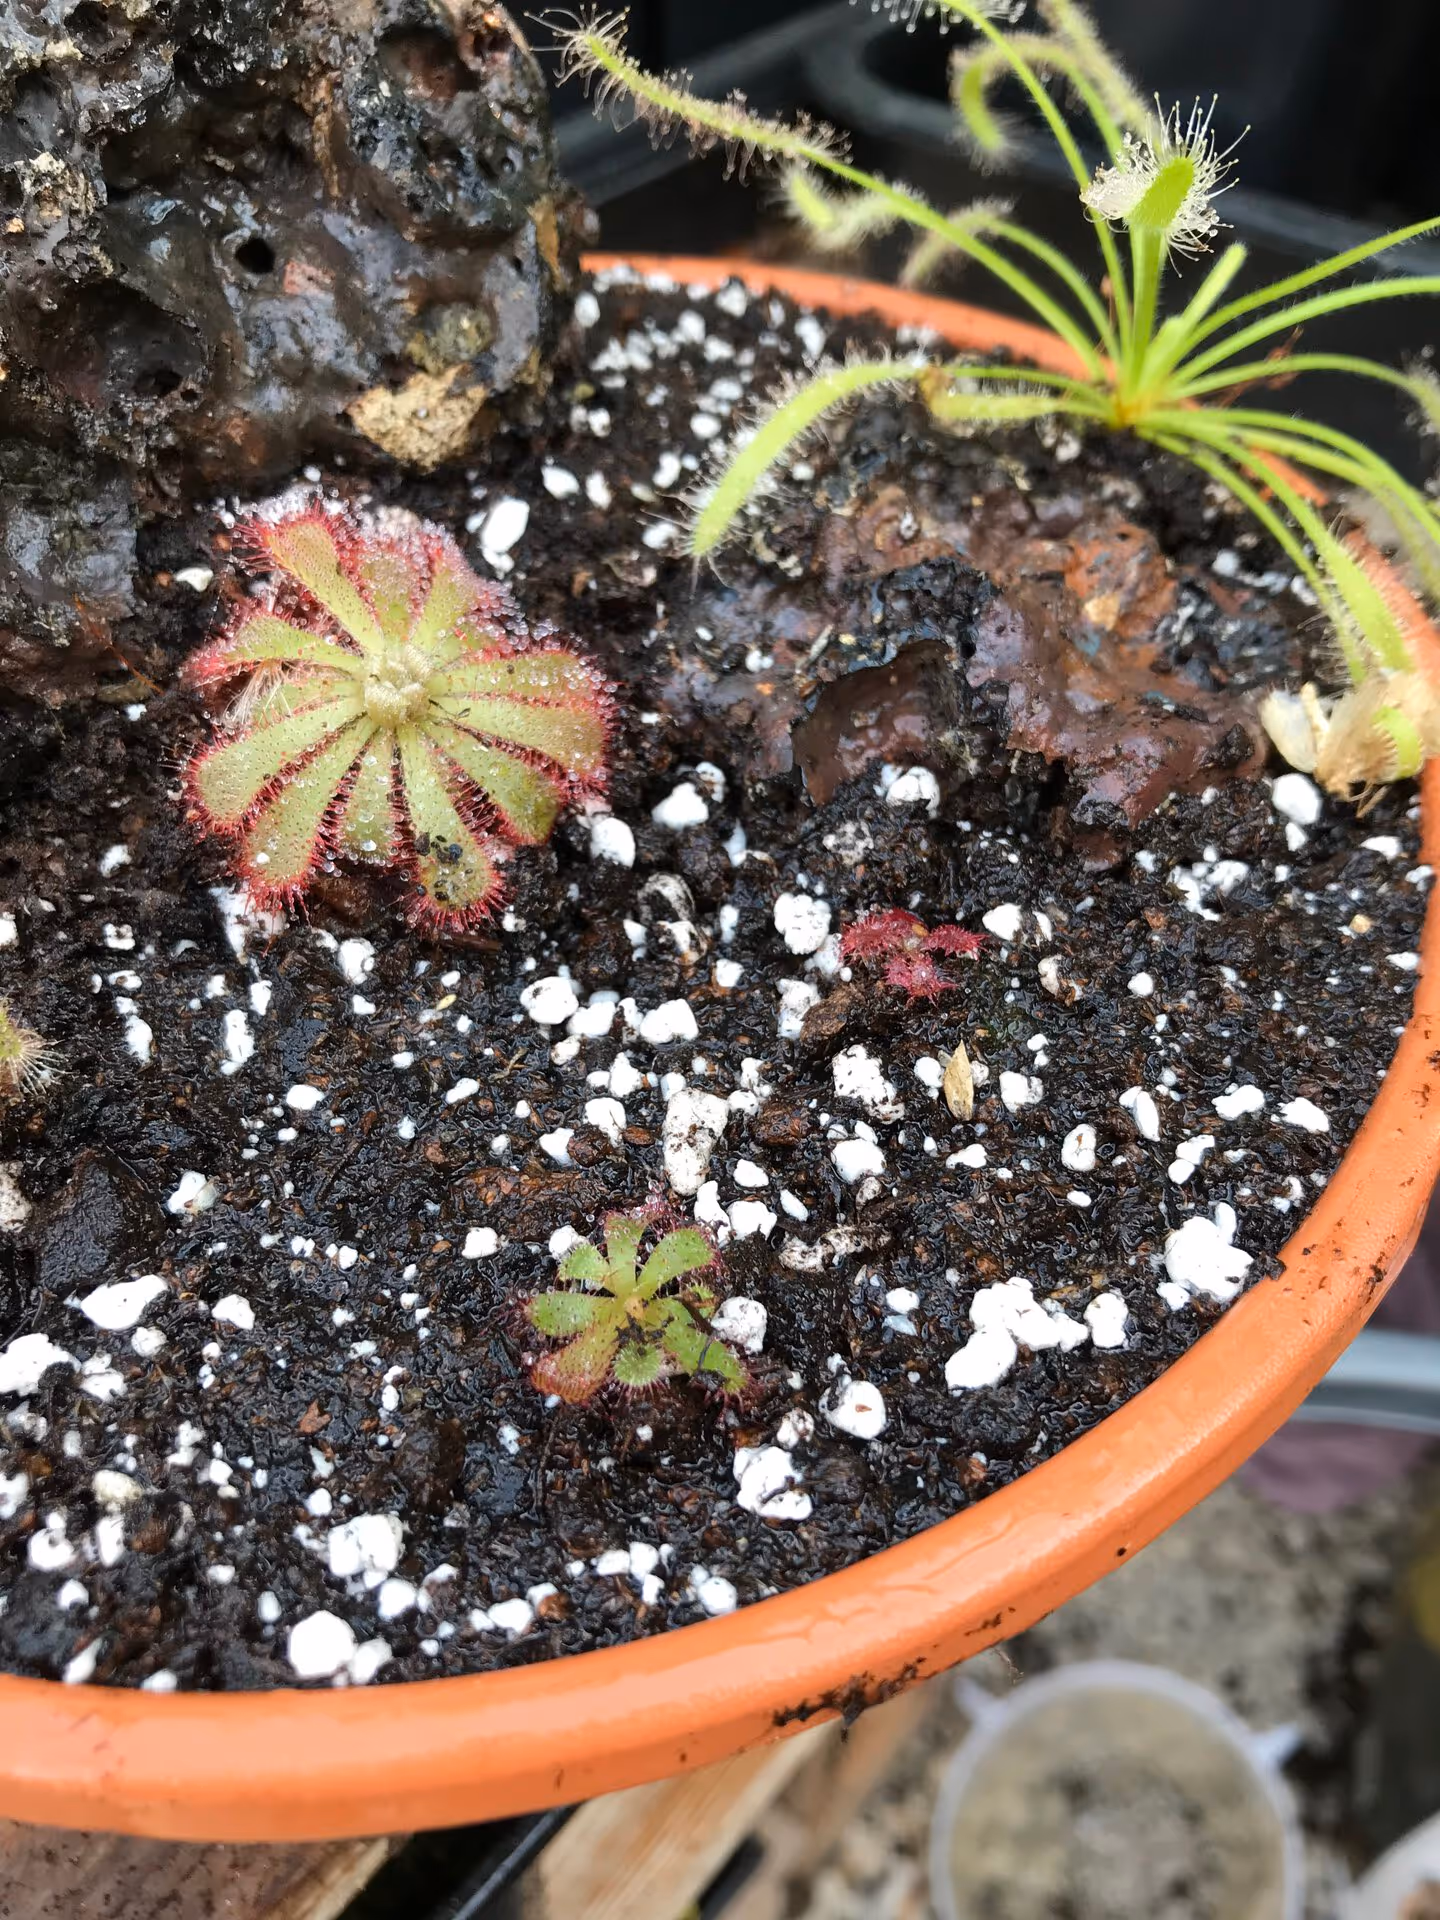 Seedlings of Drosera hamiltonii and Drosera trinervia
 Another great Drosera I love to use in these types of planters are pygmy sundews. Due to their small size and vibrant colours they make an impact when spaced around the planter. However as the pygmy sundews have a fragile root system and should not be repotted, these are best planted via gemmae in the winter into your planters. They grow quickly and should flower in the following summer!
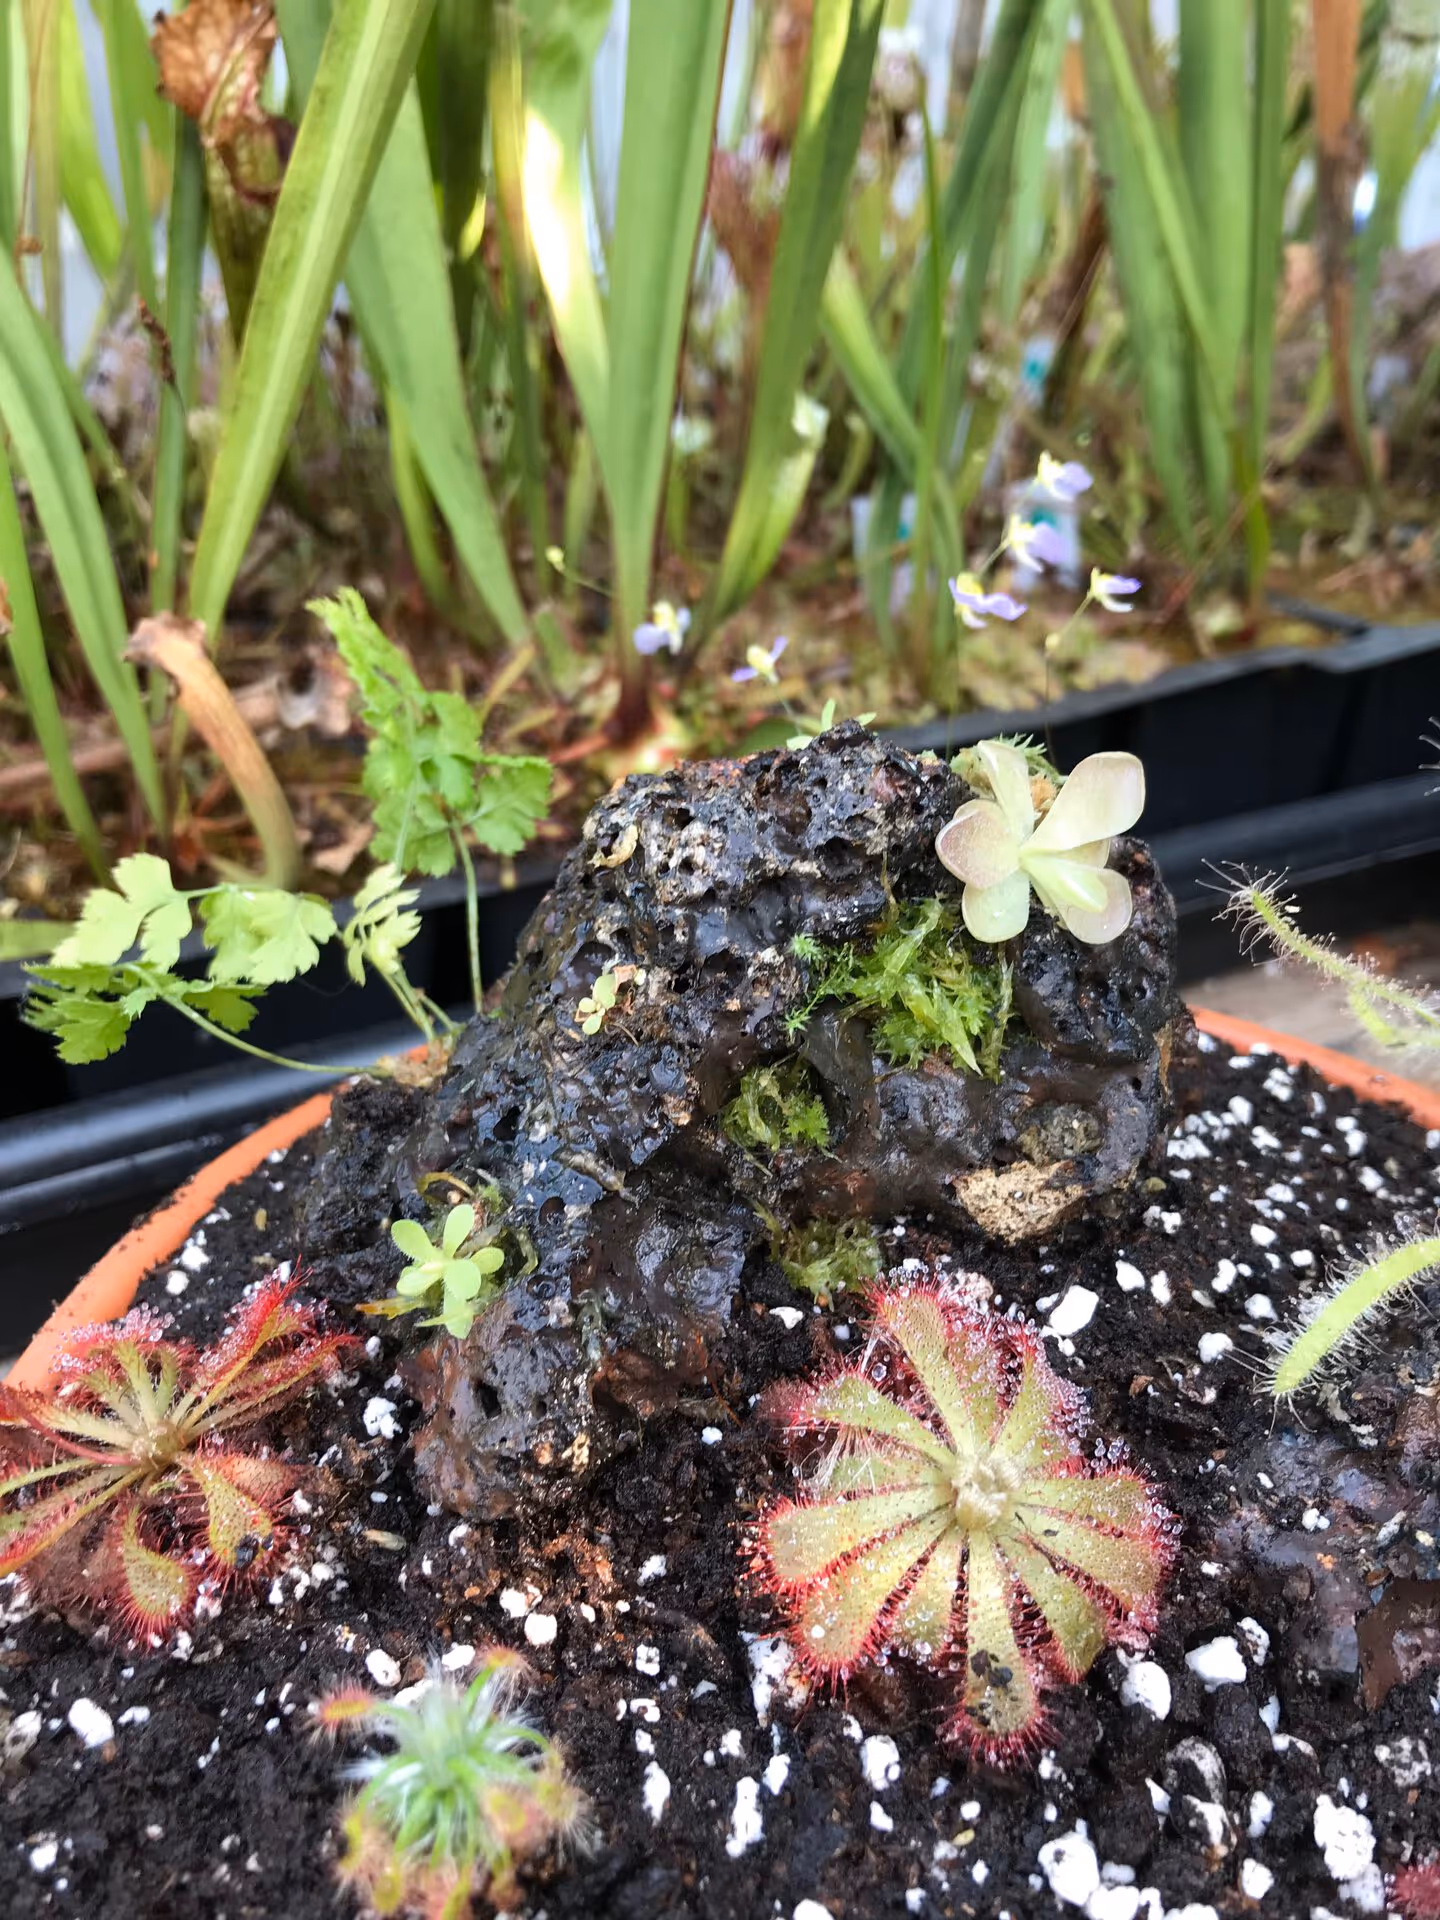
After finishing up with the Drosera I made the last minute decision to use a few Mexican Pinguicula as well, by planting them onto the lava rocks. This would work well within the planter as the Pinguicula would get moisture through the rocks from the media and all the plants could tolerate similar conditions, especially within an indoor setting.
Click on any photo to zoom in. Use arrow keys or swipe to navigate.
 Pinguicula on the lava rock, with sphagnum inserted into several pores
 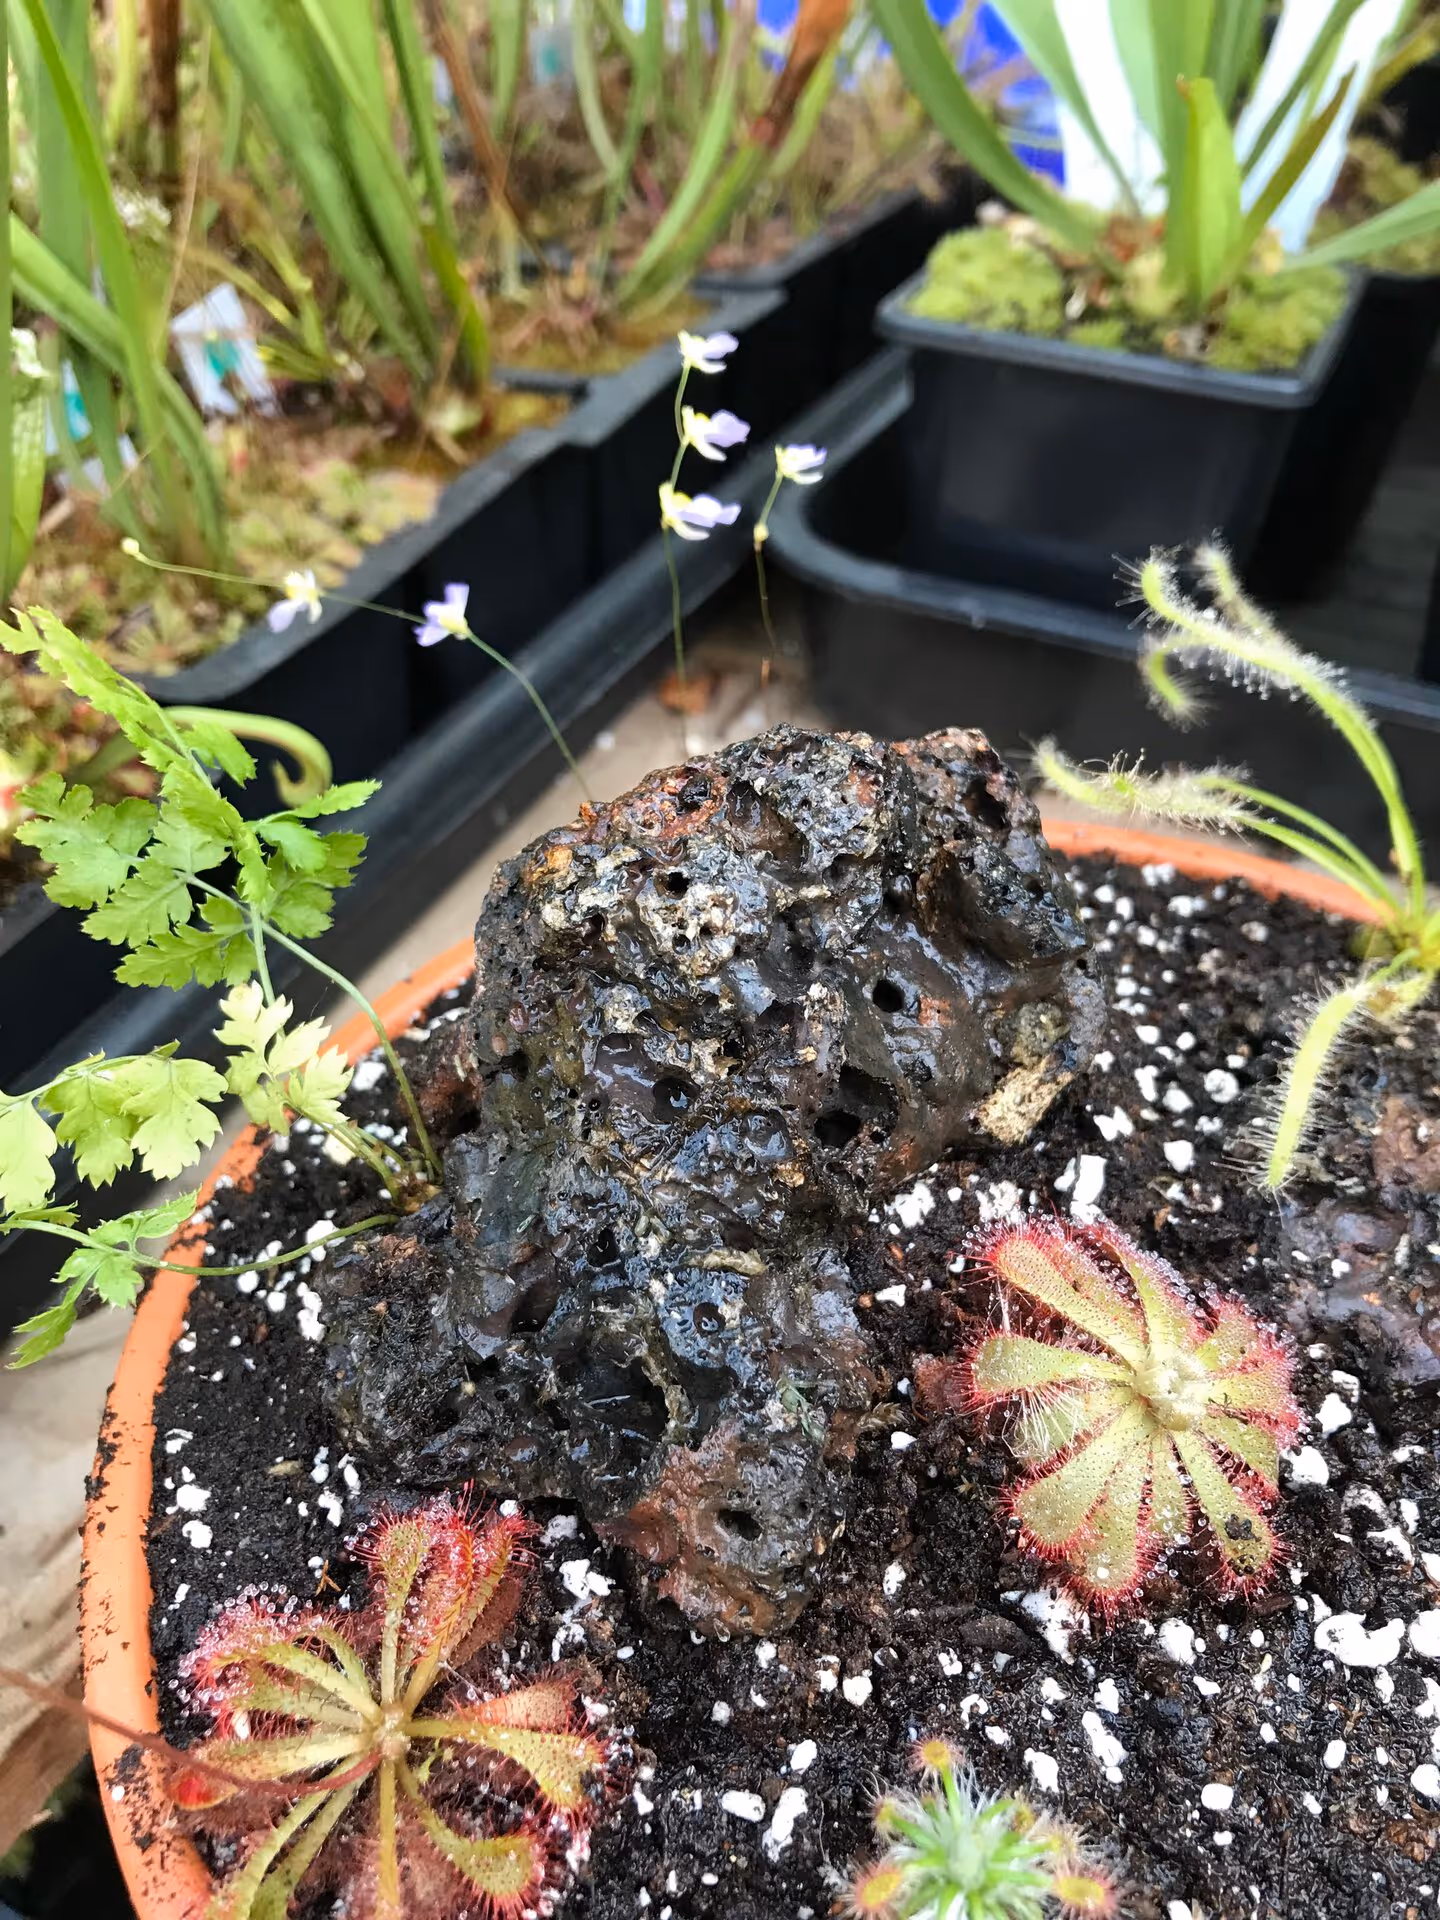 The lava rock surrounded by Drosera
 The pieces of lava rock I were using already had some larger pores, great for planting, therefore I did not need to drill into the rock itself. However, you may need to drill holes into your rocks in order for the Pinguicula to sit firmly. Using finely chopped sphagnum, I filled several holes within the rocks before gently placing several small Pinguicula into the sphagnum.
After finishing, I simply sat the pot in rainwater and that is it. This planter does not need much maintenance and will look really cool when established!
Click on any photo to zoom in. Use arrow keys or swipe to navigate.
 Finished planter, side view
 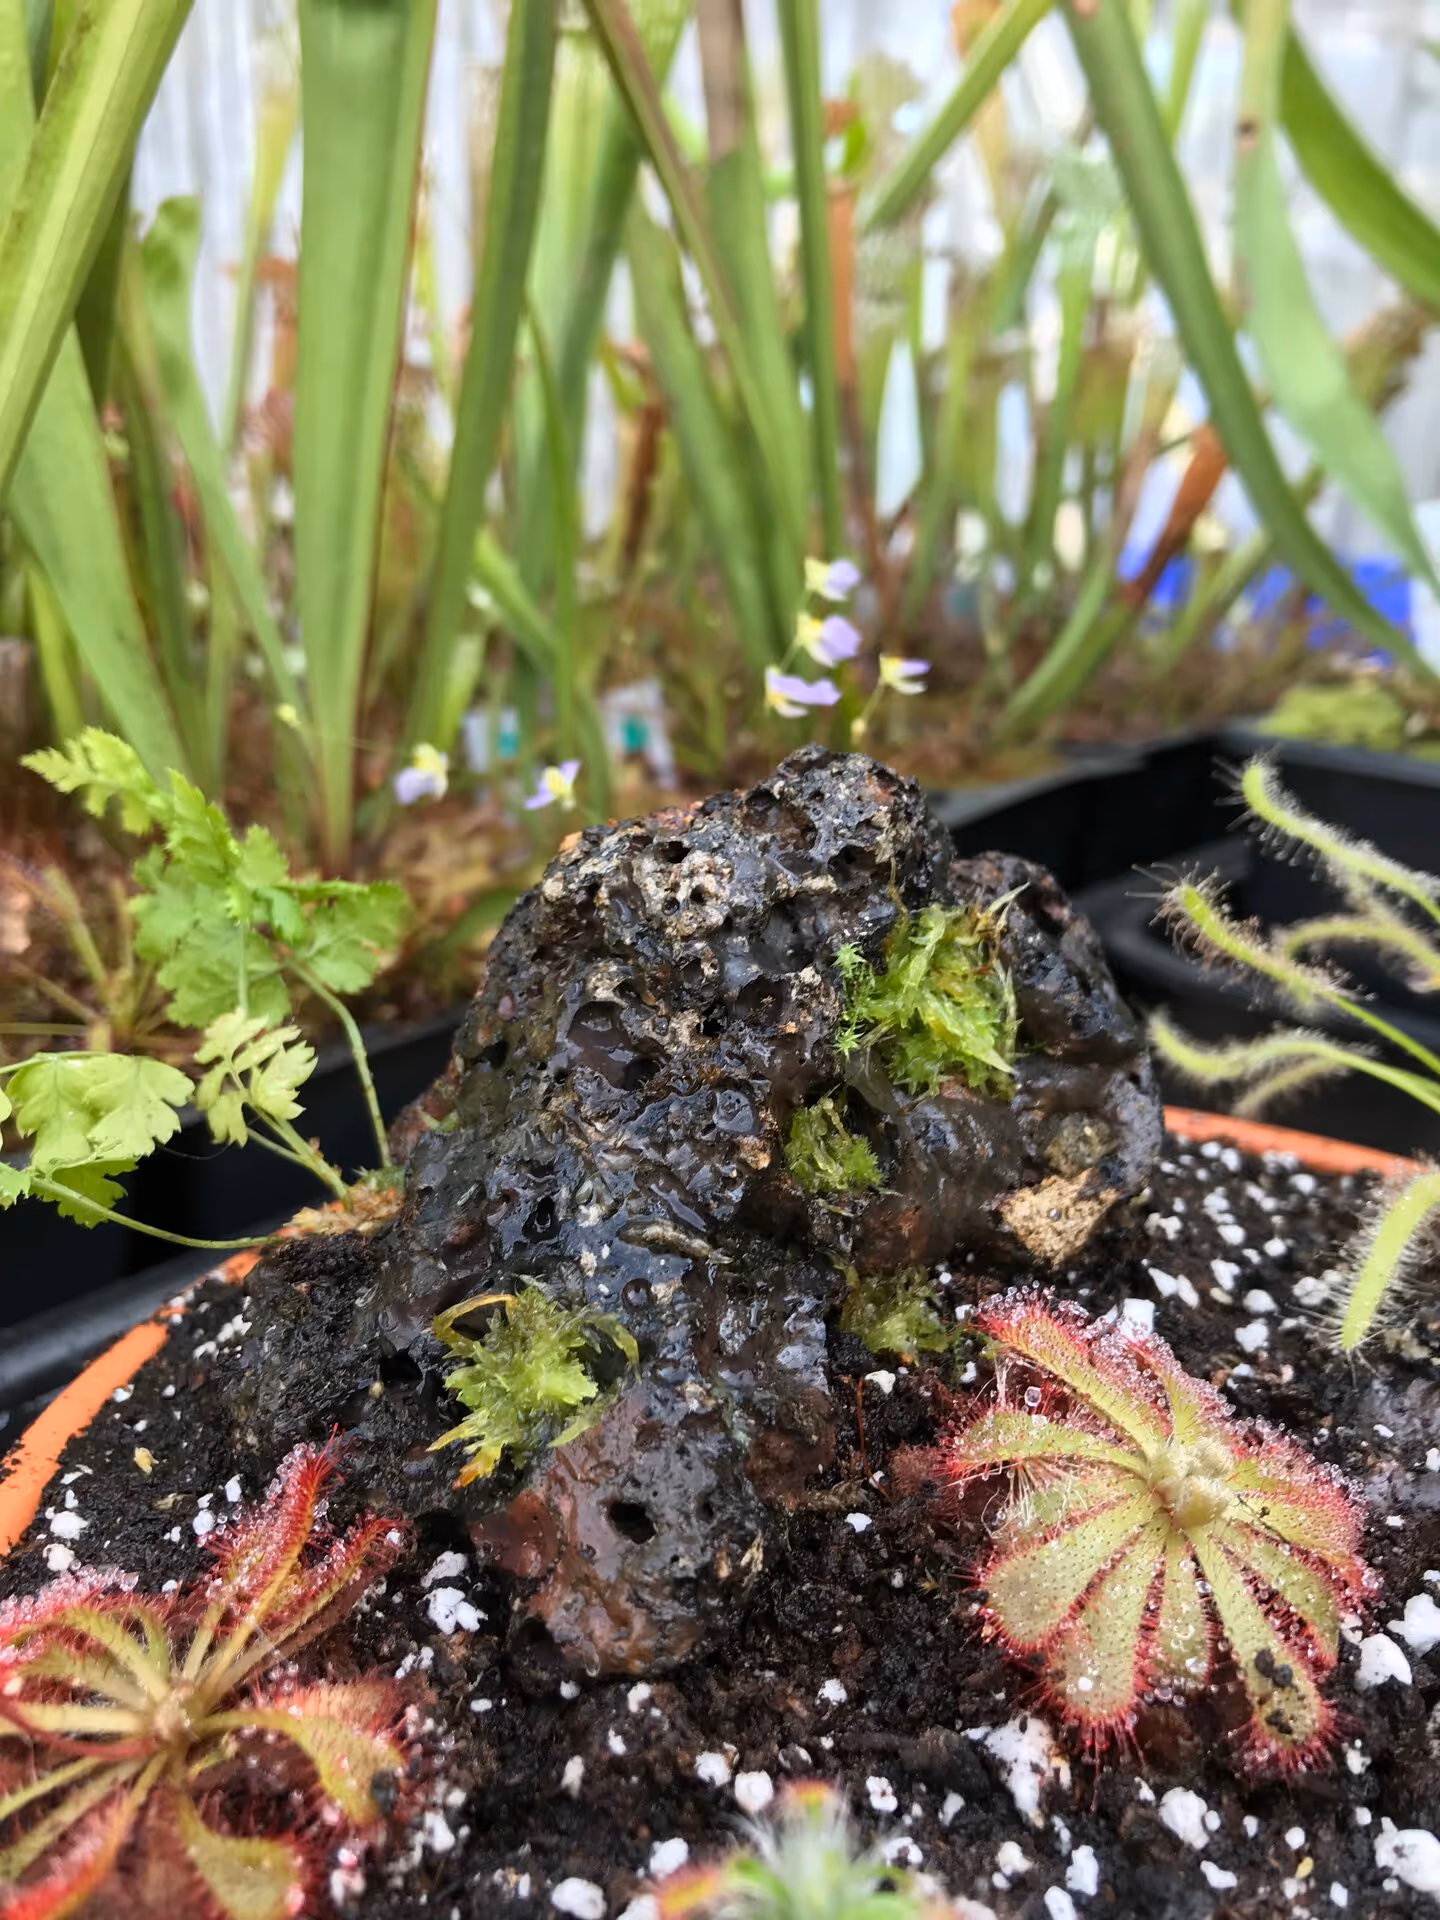 Sphagnum filling in the epores on the rock
 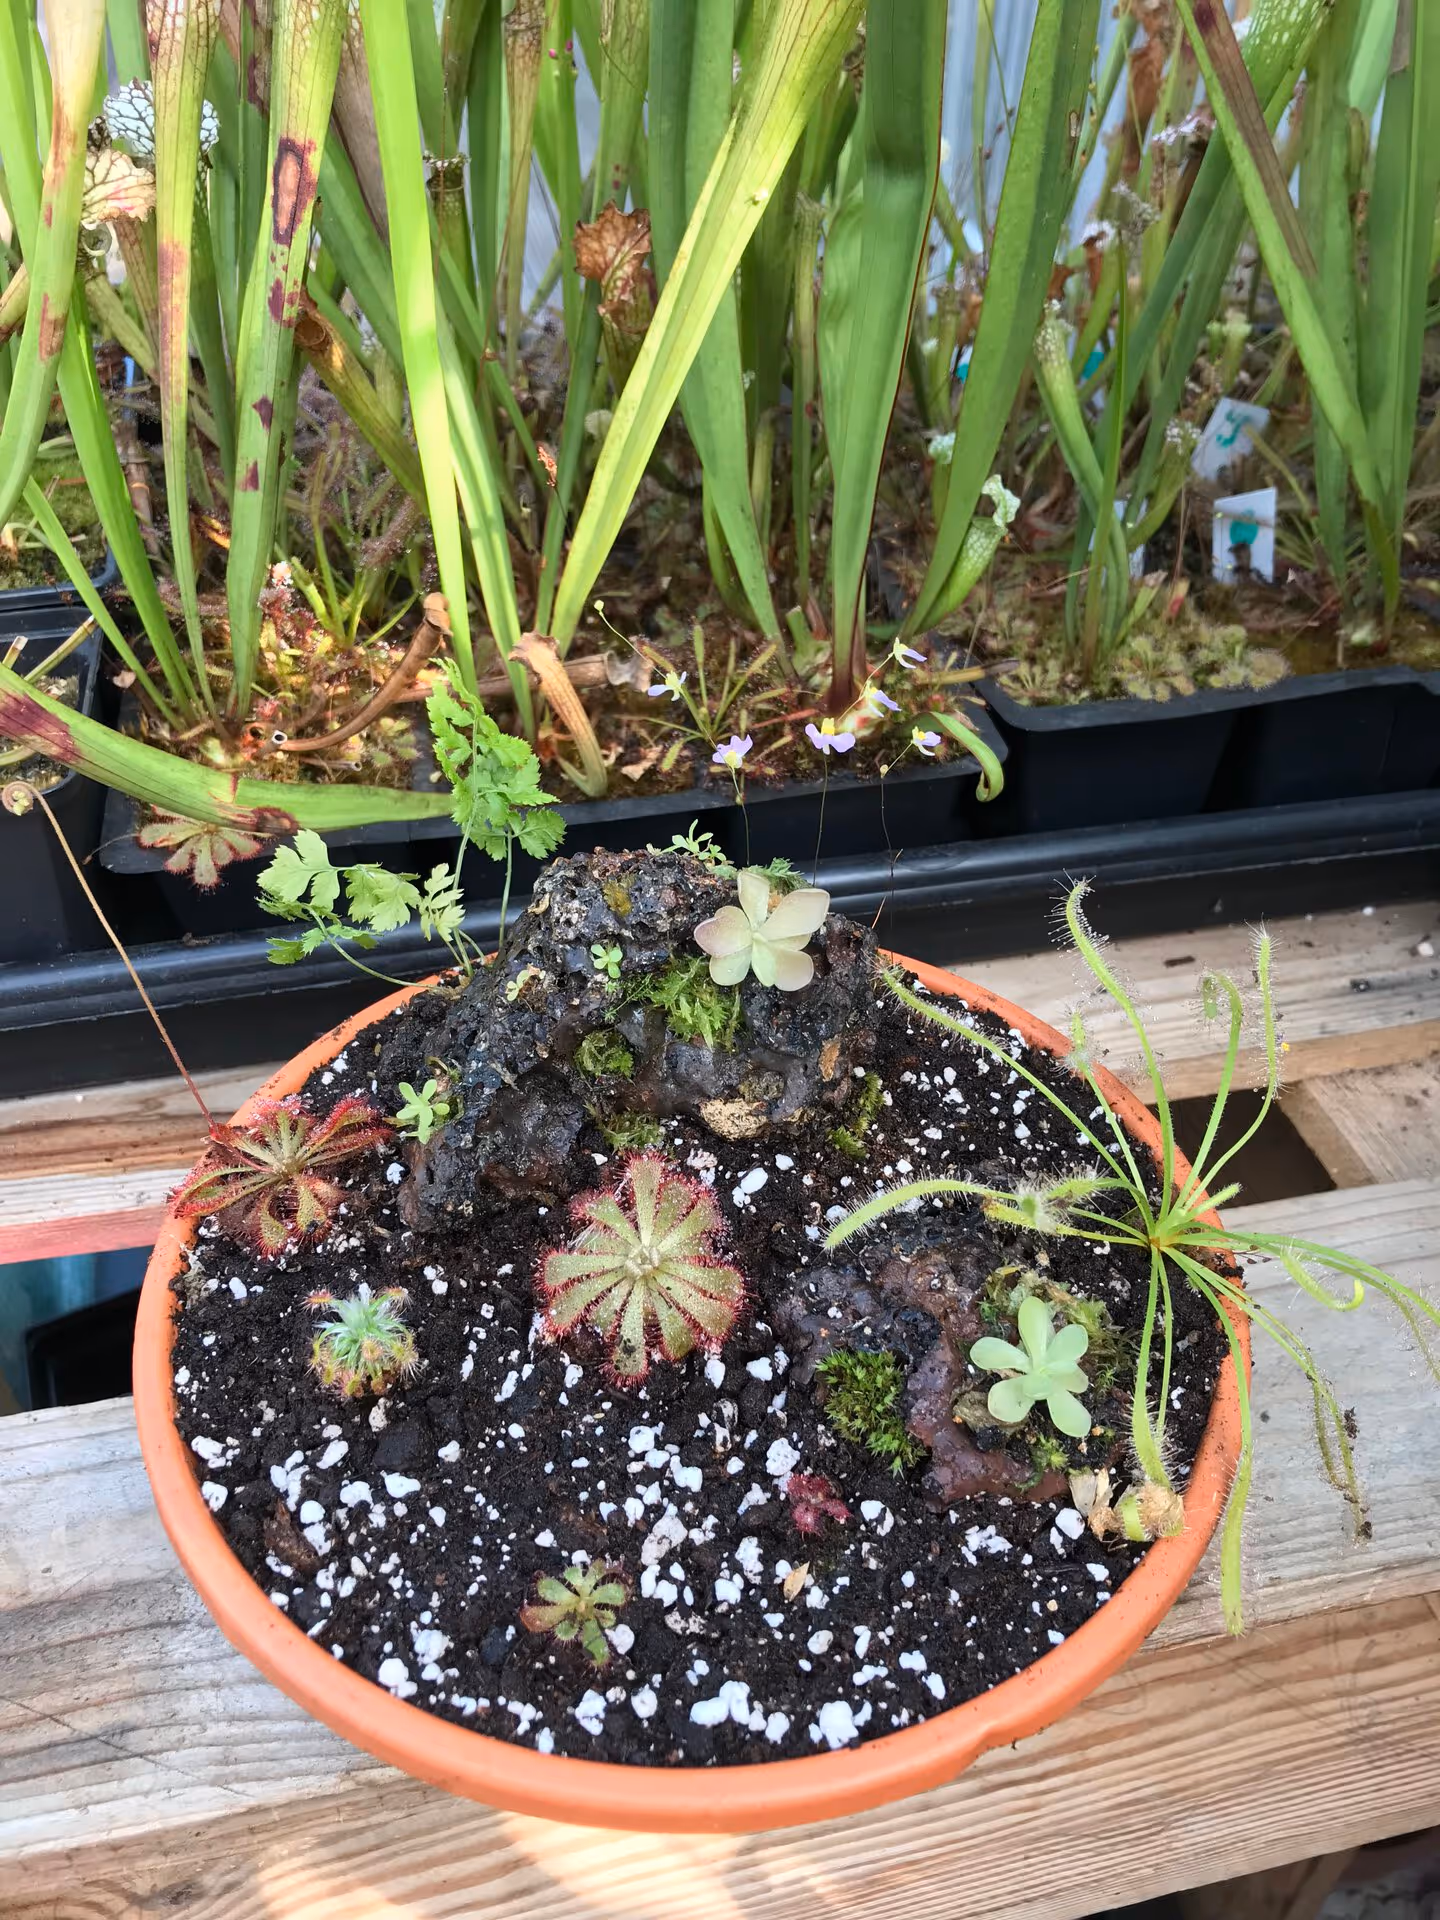 The finished carnivorous planter
 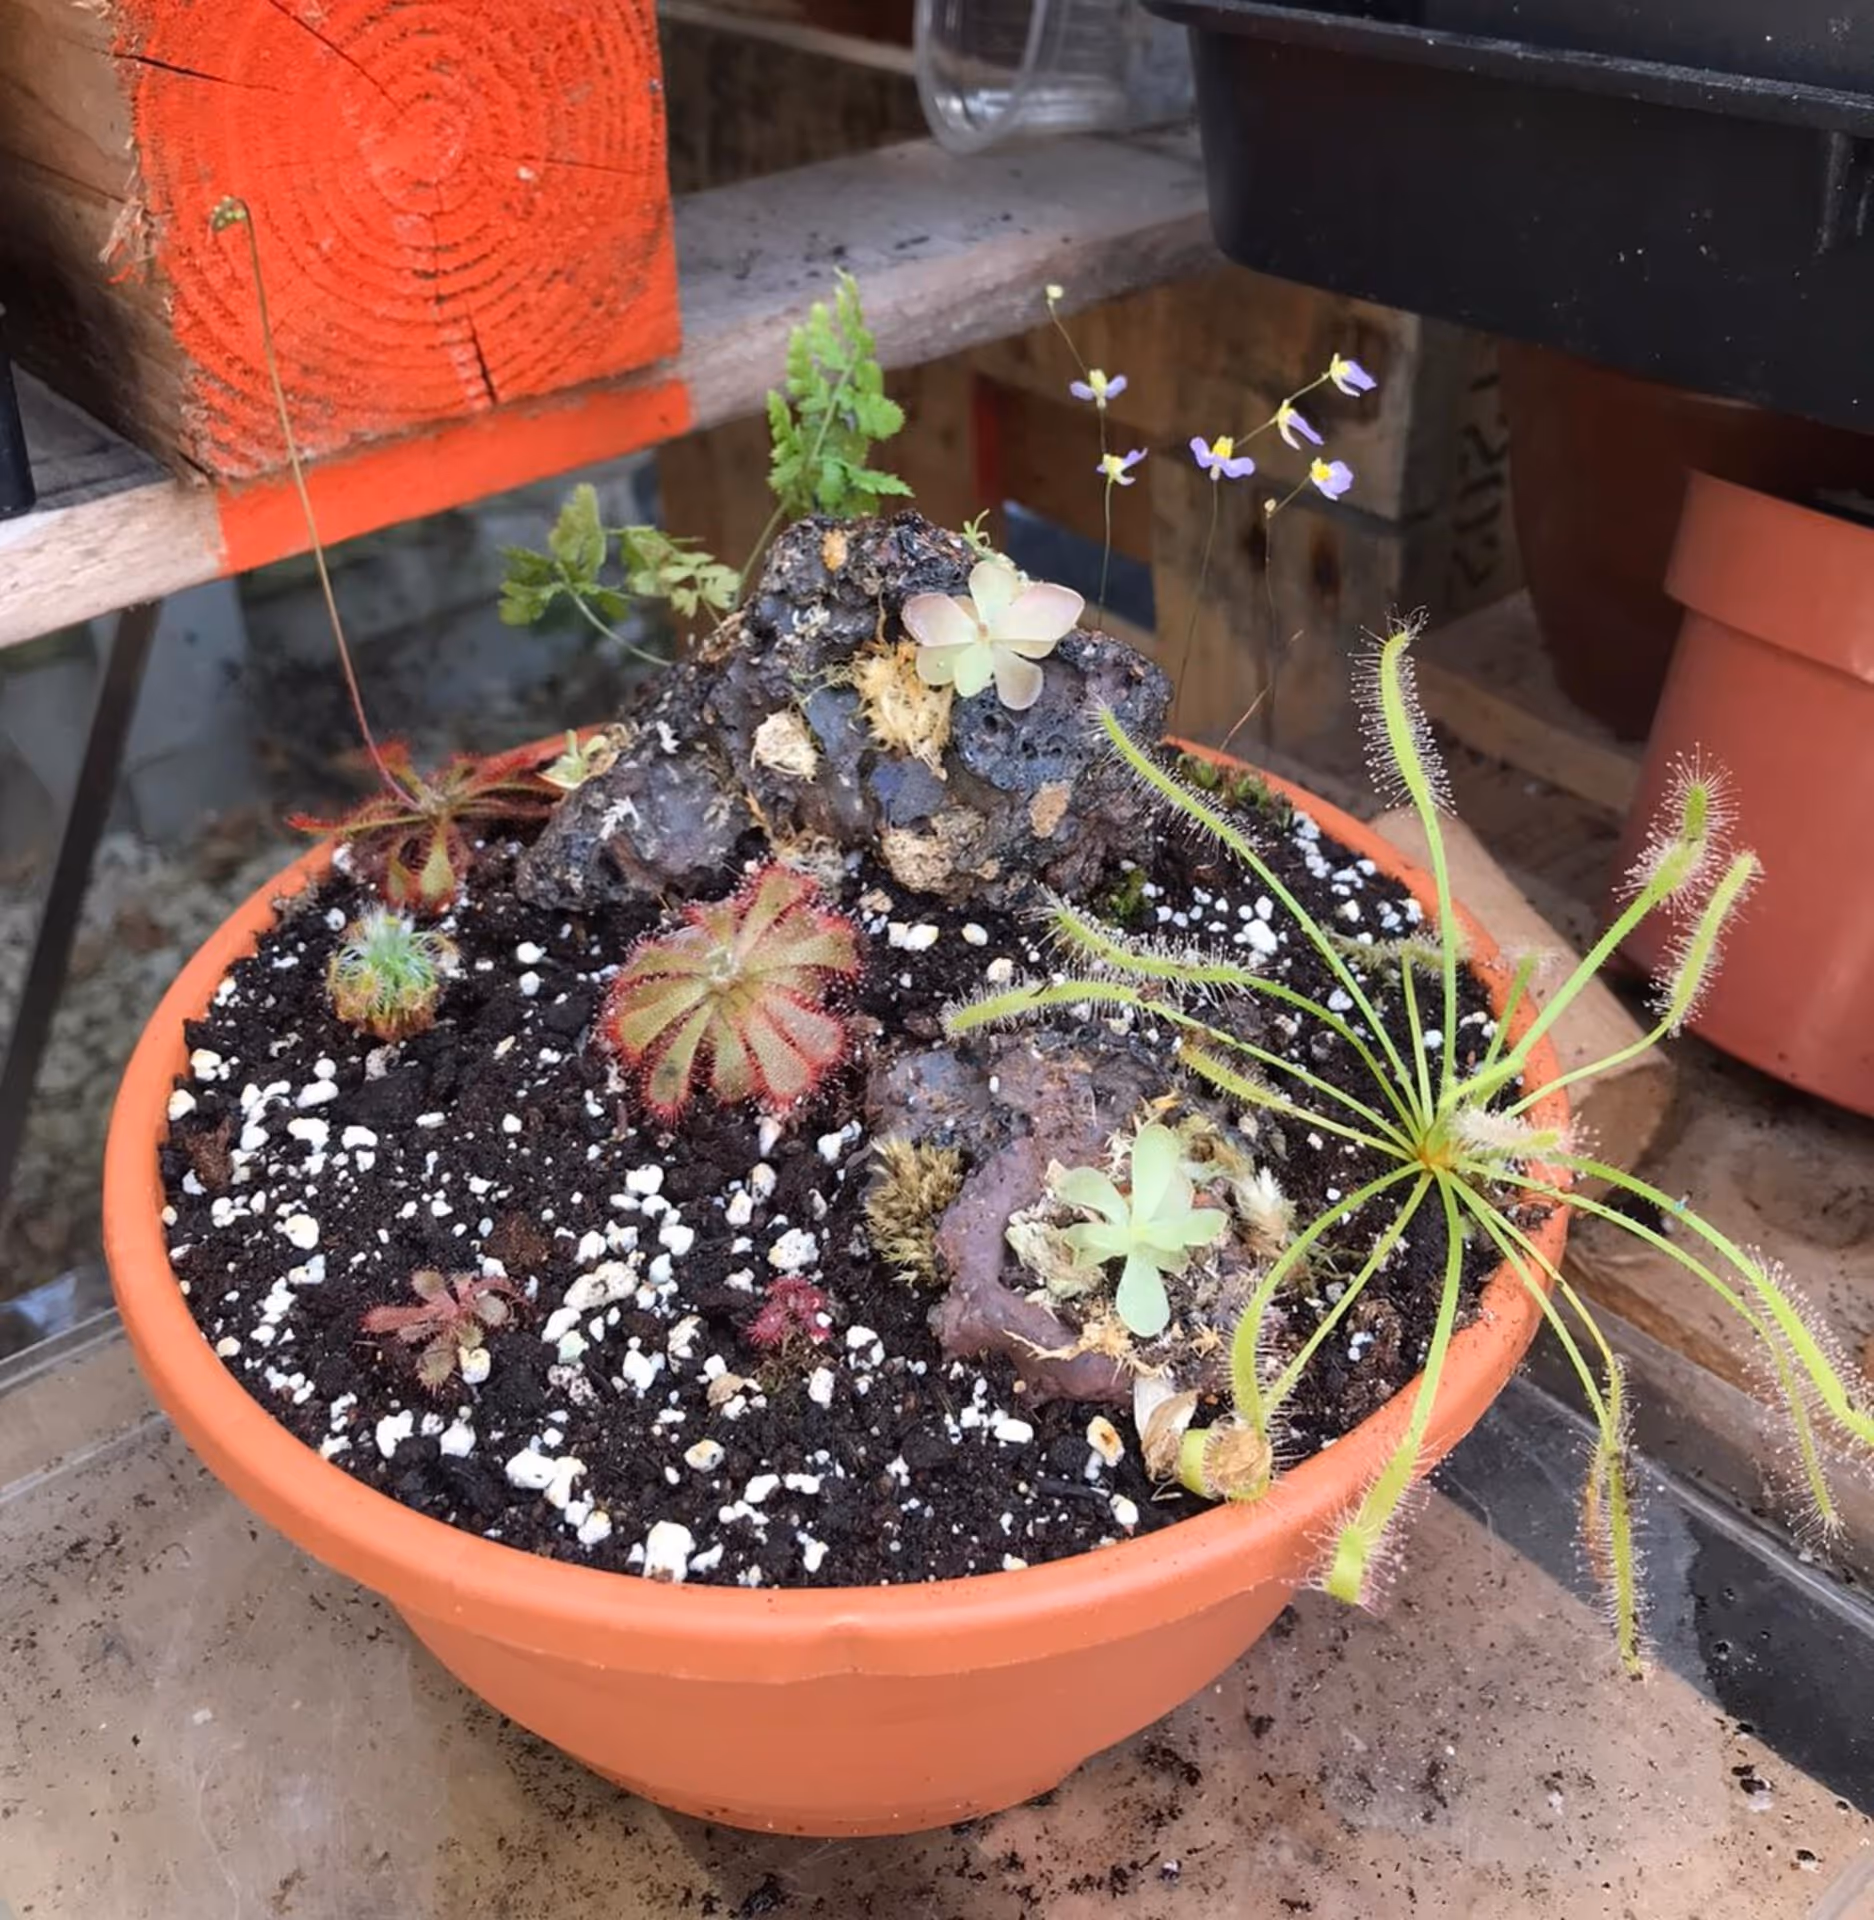 The planter, one week after planting
 I hope this has been a helpful guide to making your own decorative carnivorous planter, and I hope you have fun making your own!
I would love to see what you come up with, so send images of your creations to me at @carnivorous_plant_girl on Instagram, and please feel free to check out my new blog The Carnivorous Greenhouse.
Many thanks to Megan for putting together this fantastic tutorial - give it a try, and be sure to follow Megan on Instagram.