Today I’m very pleased to be welcoming Phil Wilson of the UK Carnivorous Plant Society to the blog. As well as being a long standing CPS committee member, Phil’s named a great many Sarracenia clones and was instrumental in the founding of the Carnivorous Plant European Exhibition and Exchange (EEE).
For his first contribution to Tom’s Carnivores he’s written a detailed guide to Sarracenia propagation. You’ll learn how to divide and repot your pitcher plants with rhizome cuttings and check your plants for potential health problems. Credit to Alex Abrams for splitting the plants in the photos.
Enjoy, and good growing!
Sarracenia are very easy to repot! They grow from a swollen stem called a rhizome which grows at soil level. Usually when you repot you will also divide your plant, as the rhizome naturally divides in most species.
Sometimes you will just want to repot a plant - if it’s a seedling that has outgrown its pot, for example. If this case, the method is much the same as below except that you won’t split the rhizome.
Spring is the best time to repot, though with a bit of luck you can do this at virtually any time of the year.
Here is the plant we are going to divide. Note the number of growing points and the several rhizomes. We will be able to turn this into several plants. You don’t have to let your plants grow this long without repotting of course!
Click on any photo to zoom in. Use arrow keys or swipe to navigate.
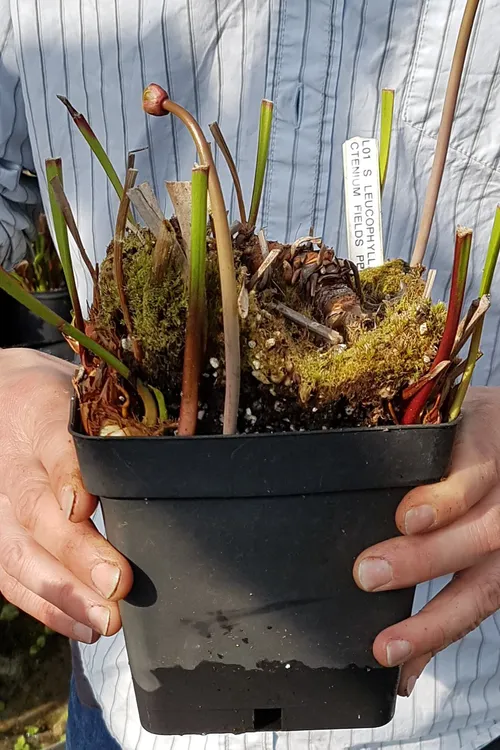 Note the number of growing points and the several rhizomes
 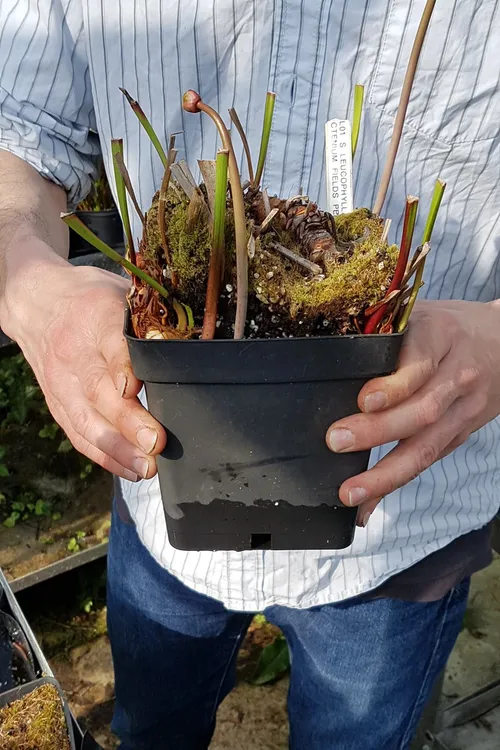 The plant to be repotted and divided
 Sarracenia won’t grow in normal garden compost. You need something that has no nutrients and has some drainage. Fortunately they aren’t that fussy!
Use sphagnum moss peat (or coir for a peat-free option) and mix it with perlite. Grit can be used as well if you prefer. Alternatively, grab a bag of ready-made carnivorous plant compost.
Be careful about perlite dust as it can be harmful. When you open the bag add some water, which will bind the dust particles. Also use a dust mask when adding it to the mix. Once mixed up it is harmless.
The ratio isn’t that important. About 3 parts peat or coir to one part perlite is fine. Once combined it should look something like the mixture below!
Click on any photo to zoom in. Use arrow keys or swipe to navigate.
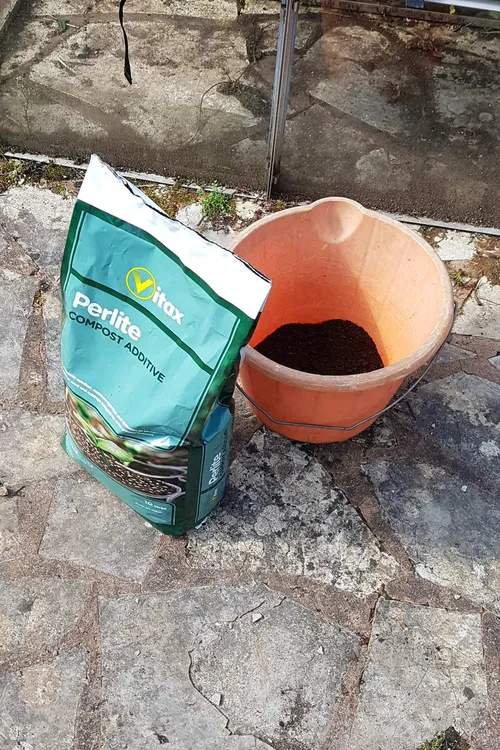 1. The key components of Sarracenia compost: perlite and sphagnum peat moss
 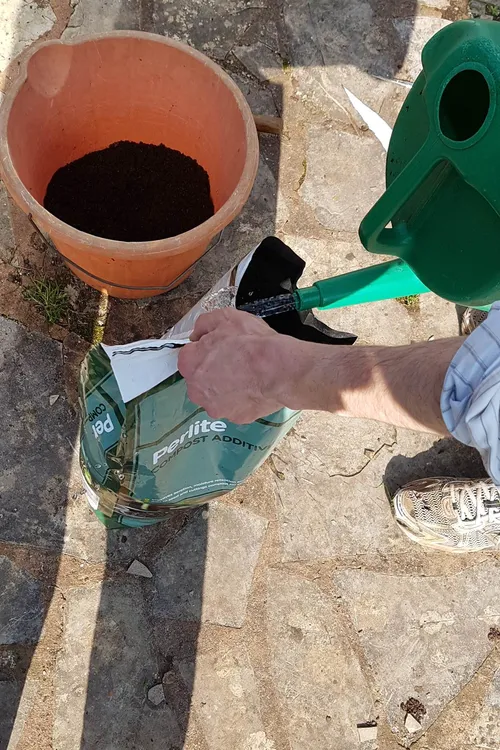 2. Add some water to the perlite to bind the dust particles
 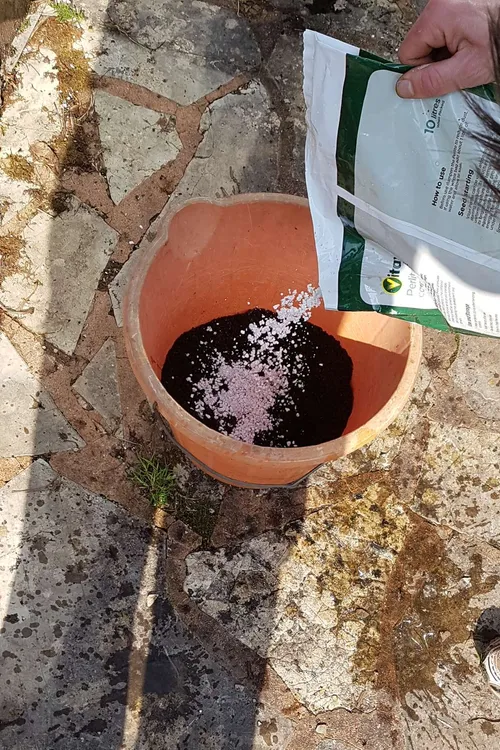 3. Mix the compost. About 3 parts peat or coir to one part perlite is fine
 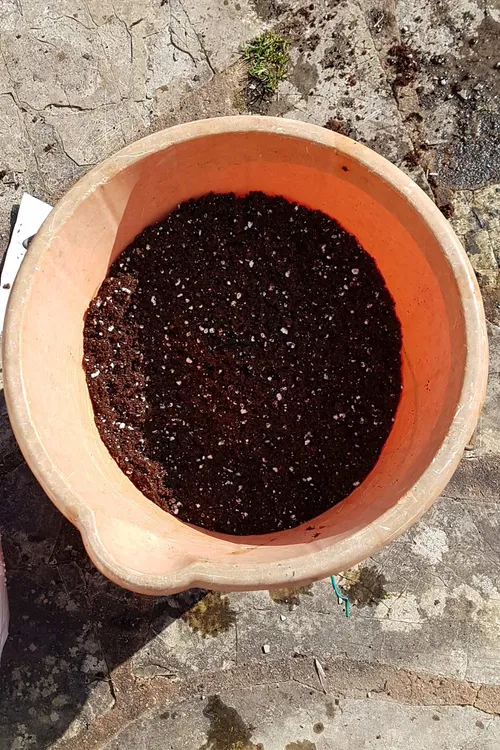 4. Once combined it should look something like this!
 Take your plant out of its pot. Below, you can see the original rhizome in the centre of the pot and see where it has spread out around the edges. Each of these growing points is a potential new plant!
This is not a gentle process! Start by shaking off some of the old compost and then pull out the growing points. You can use secateurs or a knife to cut the rhizome but it isn’t really necessary. The rhizome is fairly brittle and will break easily enough.
Click on any photo to zoom in. Use arrow keys or swipe to navigate.
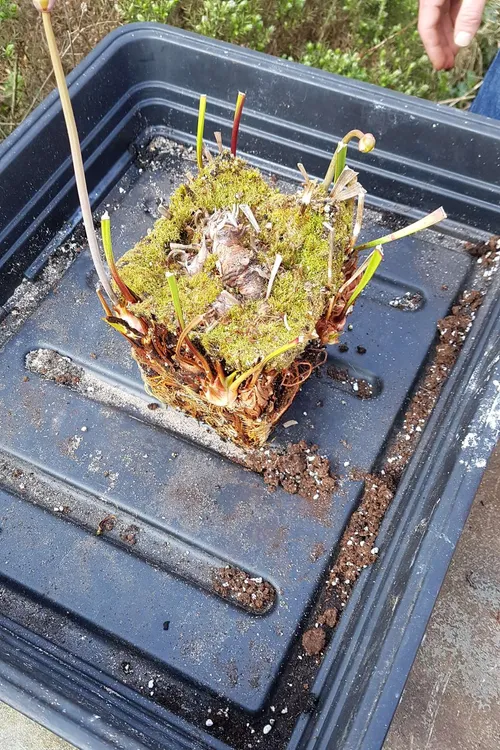 The original rhizome is in the centre of the pot. Each of the growing points is a potential new plant
 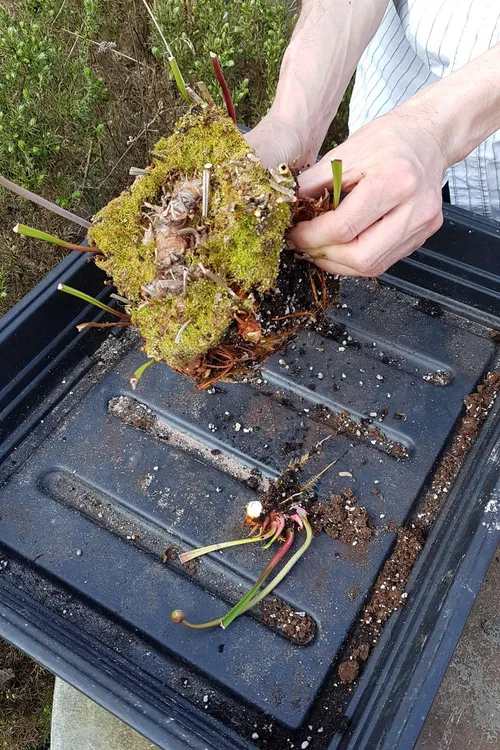 This is not a gentle process!
 Sarracenia has a fairly basic root system. It’s only there to support the plant in the soil and draw in moisture. Sarracenia get their nutrition in other ways! Don’t worry if a piece of rhizome doesn’t look as if it has many roots. The plant will survive and will grow new ones readily. You can even pot a rhizome piece without any roots!
Soon you’ll end up with a selection of bits of rhizome — all potential new plants!
Click on any photo to zoom in. Use arrow keys or swipe to navigate.
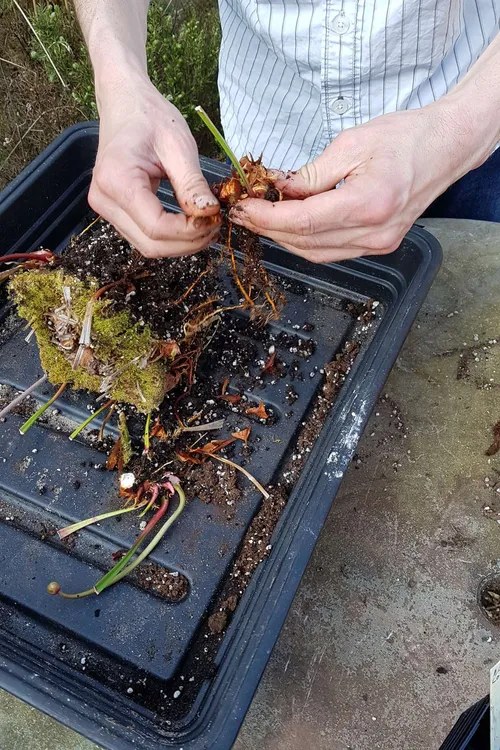 1. Splitting off pieces of the rhizome
 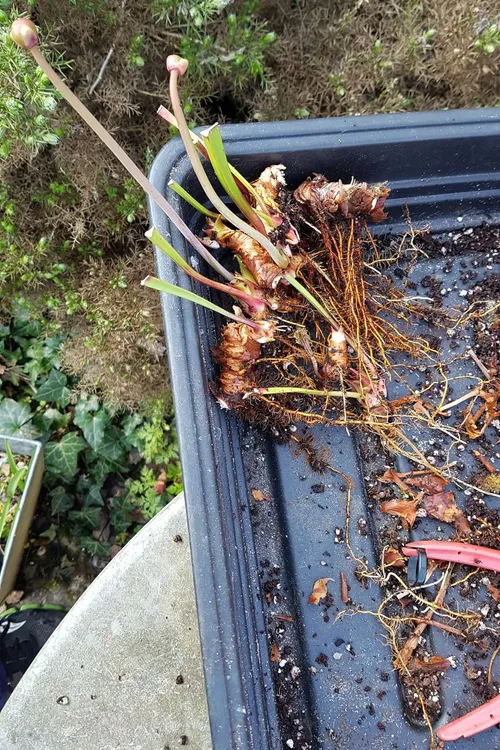 2. All of these pieces are potential new plants!
 The rhizomes will have the remains of old pitchers attached to them. Cut these off as you go. They can lead to rhizome rot when you repot, though more importantly, they can hide areas of rot in the rhizome.
Sarracenia rhizomes naturally rot from the old end as the plant grows. When the plant is established and growing well this isn’t usually a problem but it can infect healthy tissue when the plant is under stress from a repot.
We didn’t find any rot in this rhizome, but if you do, either remove the rotten part by breaking it off or cut it out with a sharp knife.
Next, fill a pot with the compost you made earlier.
Click on any photo to zoom in. Use arrow keys or swipe to navigate.
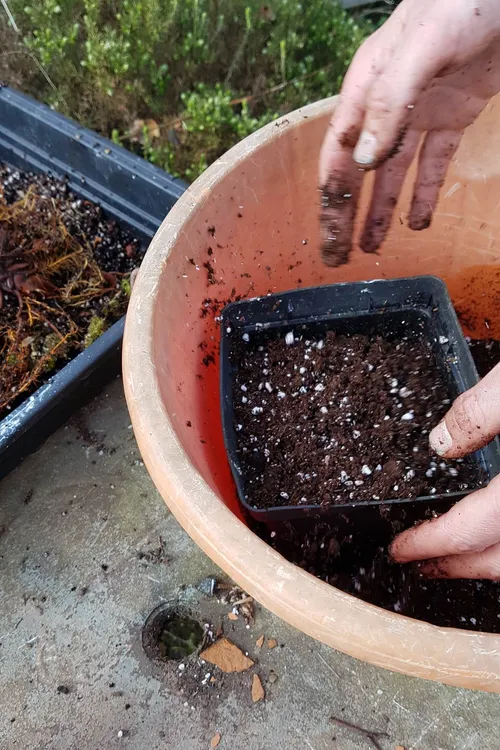 Fill a pot with compost. It should be about 2-3 times the length of the rhizome on the plant you are potting up
 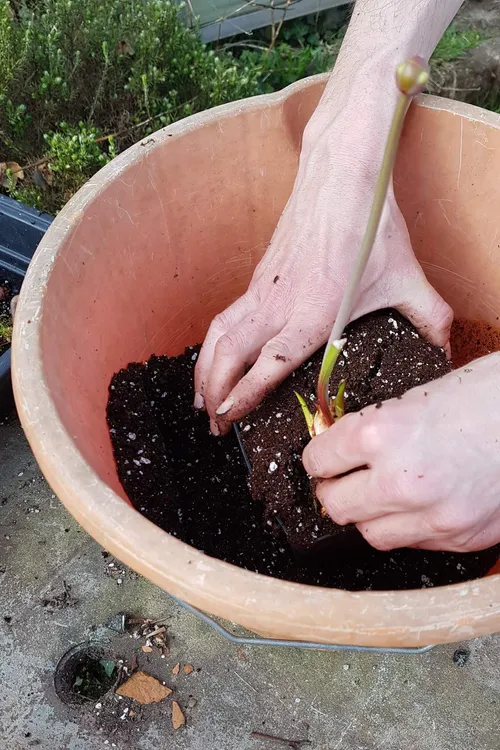 Make a hole in the compost as deep and long as the roots. Drop the plant in keeping the main part of the rhizome around soil level
 The size of pot is not too important. It should be about 2-3 times the length of the rhizome on the plant you are potting up so the plant has enough room to create new growth. As a guide use a 7.5cm pot for small plants and 15cm pots for larger plants. You can use larger pots but be warned that the plant may struggle if the pot size is too big.
Fill the pot so the compost is slightly domed and press the surface down gentle so it’s flat. Don’t press too hard or you will compress the soil too much. Your plant won’t appreciate it!
Make a hole in the compost with your finger or thumb. This should be very easy to do. If it’s hard to get your finger in then it’ll be hard for the plant’s roots to penetrate too!
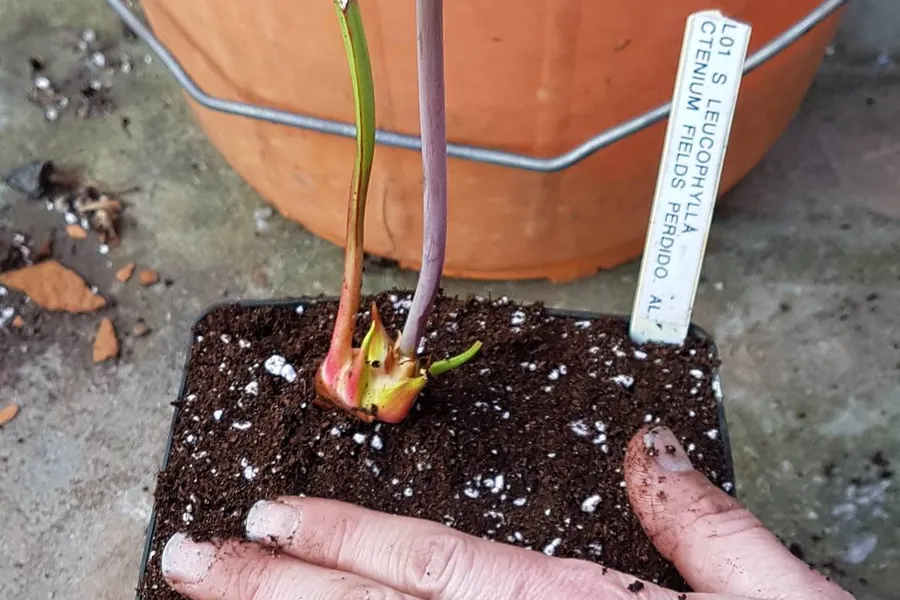
The hole should be about as deep and as long as the roots. Drop the plant in, keeping the main part of the rhizome around soil level. It’s a good idea to angle the rhizome slightly so that the growing point is just clear of the soil. This minimises the chance of fungal infections.
Click on any photo to zoom in. Use arrow keys or swipe to navigate.
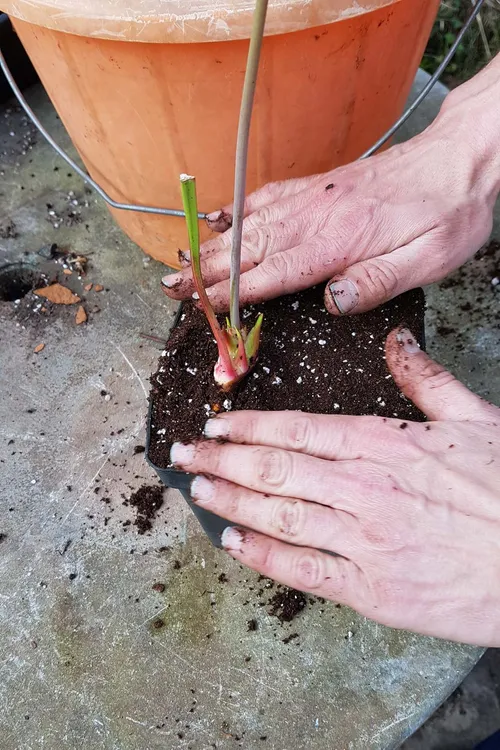 Angle the rhizome slightly so that the growing point is just clear of the soil
 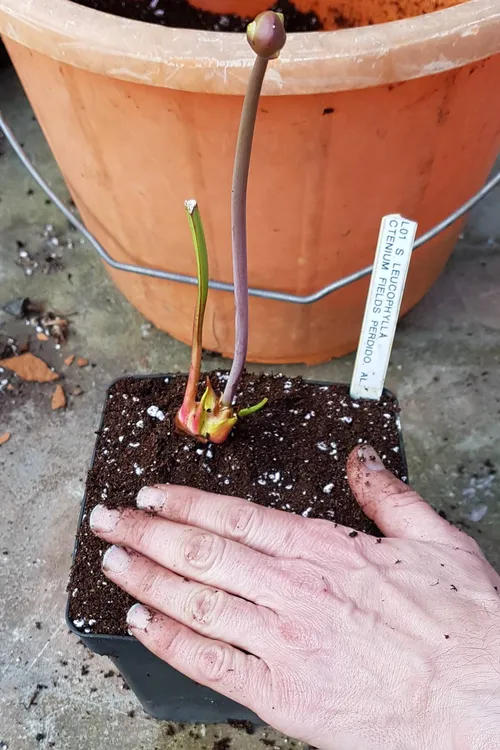 Give it a final firm up, add a plant label, and put the pot in some water
 Give it a final firm up, add a plant label (easy to forget that!), and put the pot in some water. The loose compost will draw water in quite quickly, so you may need to top up the water a bit.
Watch out for pieces of plant that are top heavy, especially if they don’t have many roots. This can hinder the plant’s recovery. It’s not easy to do but we might need to cut that flower bud off!
After repotting keep an eye on the plants and check for fungal infections. Any pitchers that suddenly die are a sure sign of a problem. It’s sometimes possible to save a plant that has developed rot by taking the plant out of its pot and carefully cutting any rot away. This is a bit weather-dependent too. A cold wet spring can cause problems. You can use a fungicide at repotting time, though it’s not usually necessary.
After repotting it will take about a year for the plant to recover. Pitcher growth and colour are often temporarily reduced. Pay extra close attention to their growing requirements after repotting.
In a few months I’ll be writing a post on how to use blind rhizome cuttings to propagate plants. This is a brilliant use of old bits of rhizome that a lot of people just throw away. I’ll also be exploring ways to take pitcher cuttings. Yes – you can take pitcher cuttings from Sarracenia!
A big thank you to Phil Wilson for taking the time to write this post, and to Alex Abrams for his help with the photos! To be notified when Phil’s next post goes live, you can subscribe to Tom’s Carnivores.
